# Manage Knowledge Base
# Overview
The Knowledge Base (KB) Editor in GPT Pro is a powerful tool designed to help users create, manage, and update internal knowledge bases effortlessly. This tool centralizes critical information, ensuring that the virtual agent provides accurate, consistent, and up-to-date responses.
# Accessing the Q&A Editor
To access the KB Editor, navigate to the GPT Pro admin panel at admin.gpt-pro.com and select the Knowledge option from the side menu and choose Questions/answers. Three tabs are available: 'Q&A configuration', 'Images gallery', and 'Tags'.
# Creating and Managing Knowledge Entries
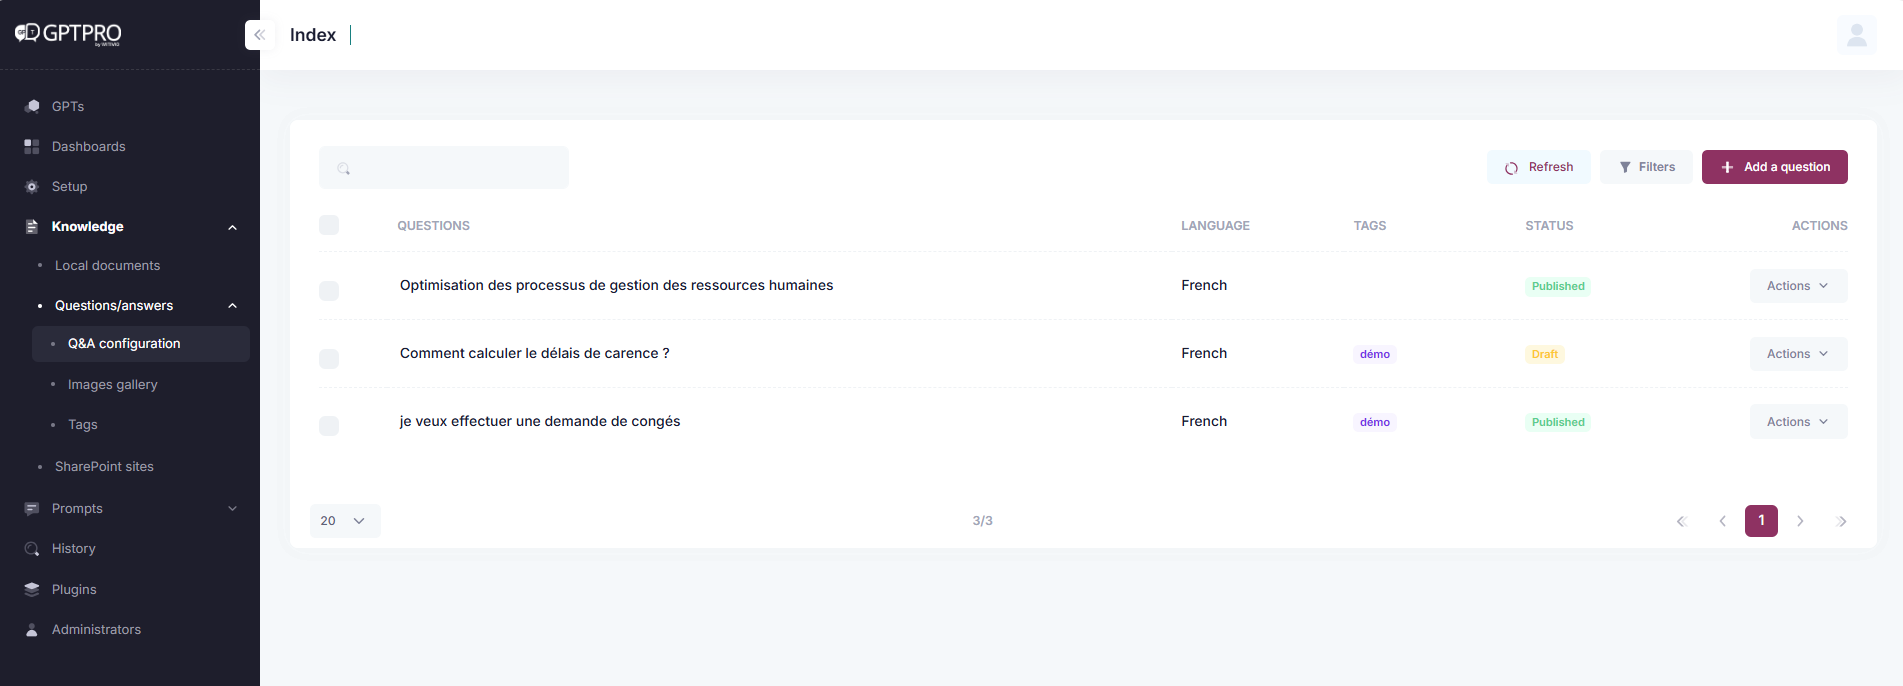
# Step 1 : Q&A configuration
# Adding New Questions and Answers
- Navigate to the KB Editor: Open the Knowledge Base Editor from the admin panel.
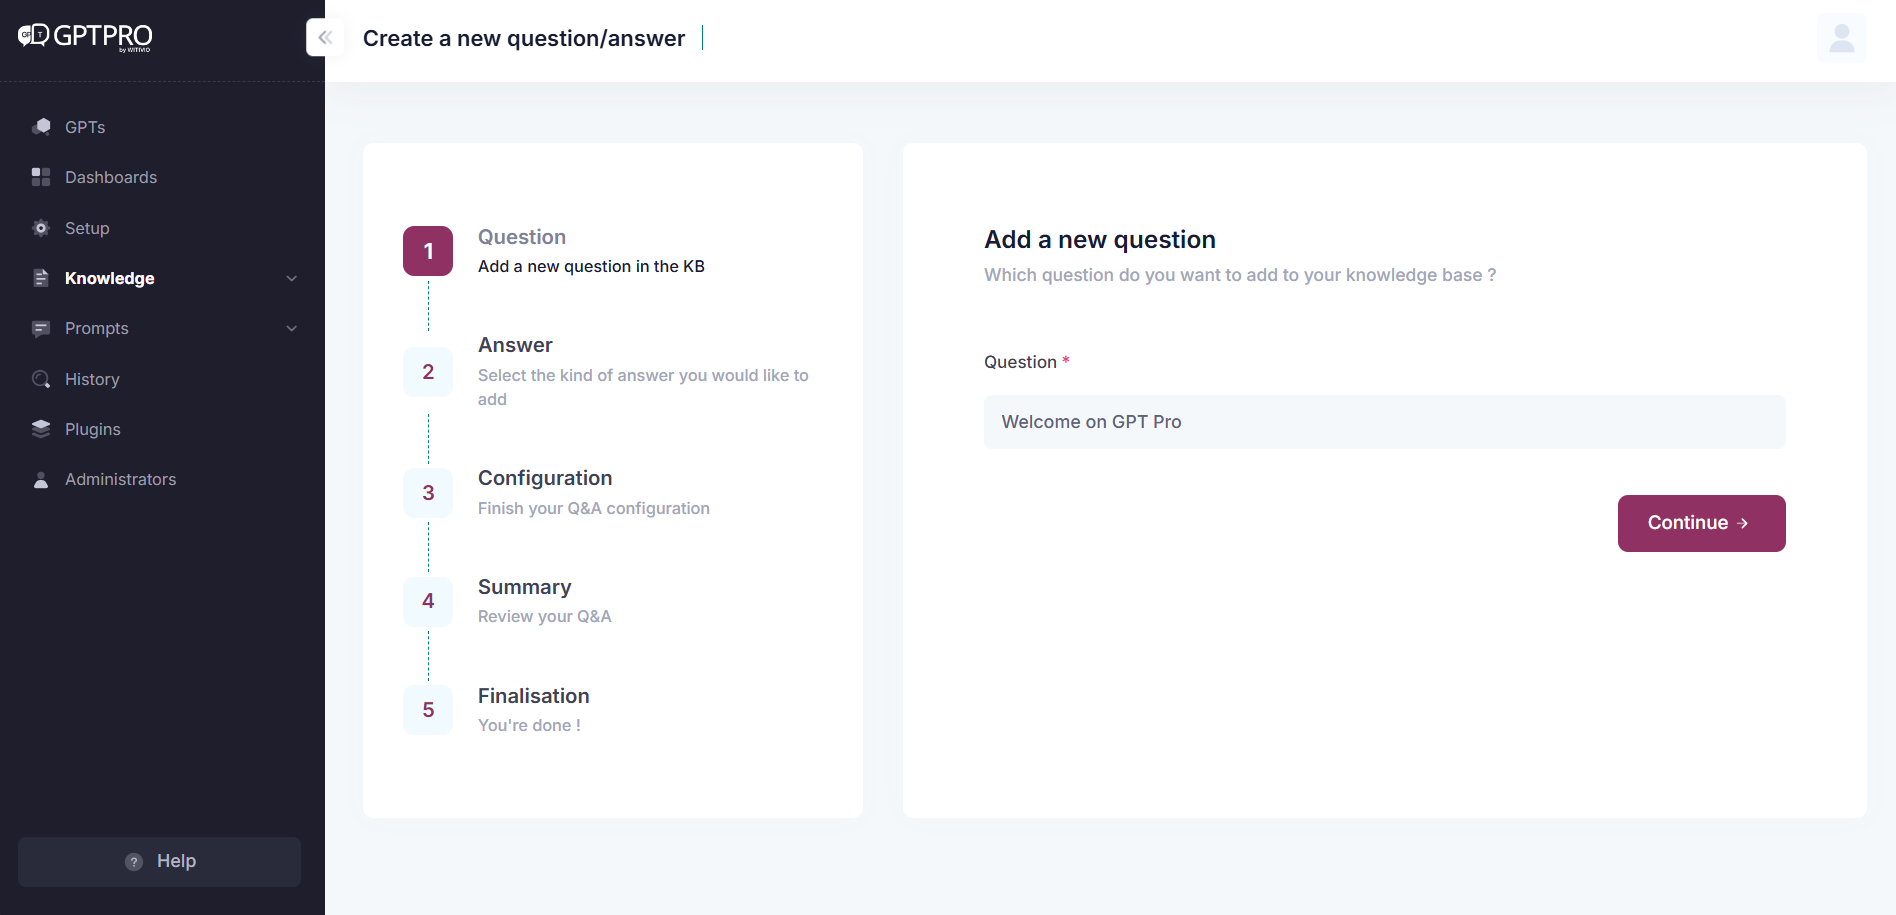
- Add New Entry: Click on the "+ Add question" button.
- Enter Question : Fill in the fields for the question and the corresponding answer. Ensure that the information is clear and concise.
- Choose answer type: Choose answer type by clicking on the
simpleor thecardanswer type. Soon,flowanswer type will be available to choose.
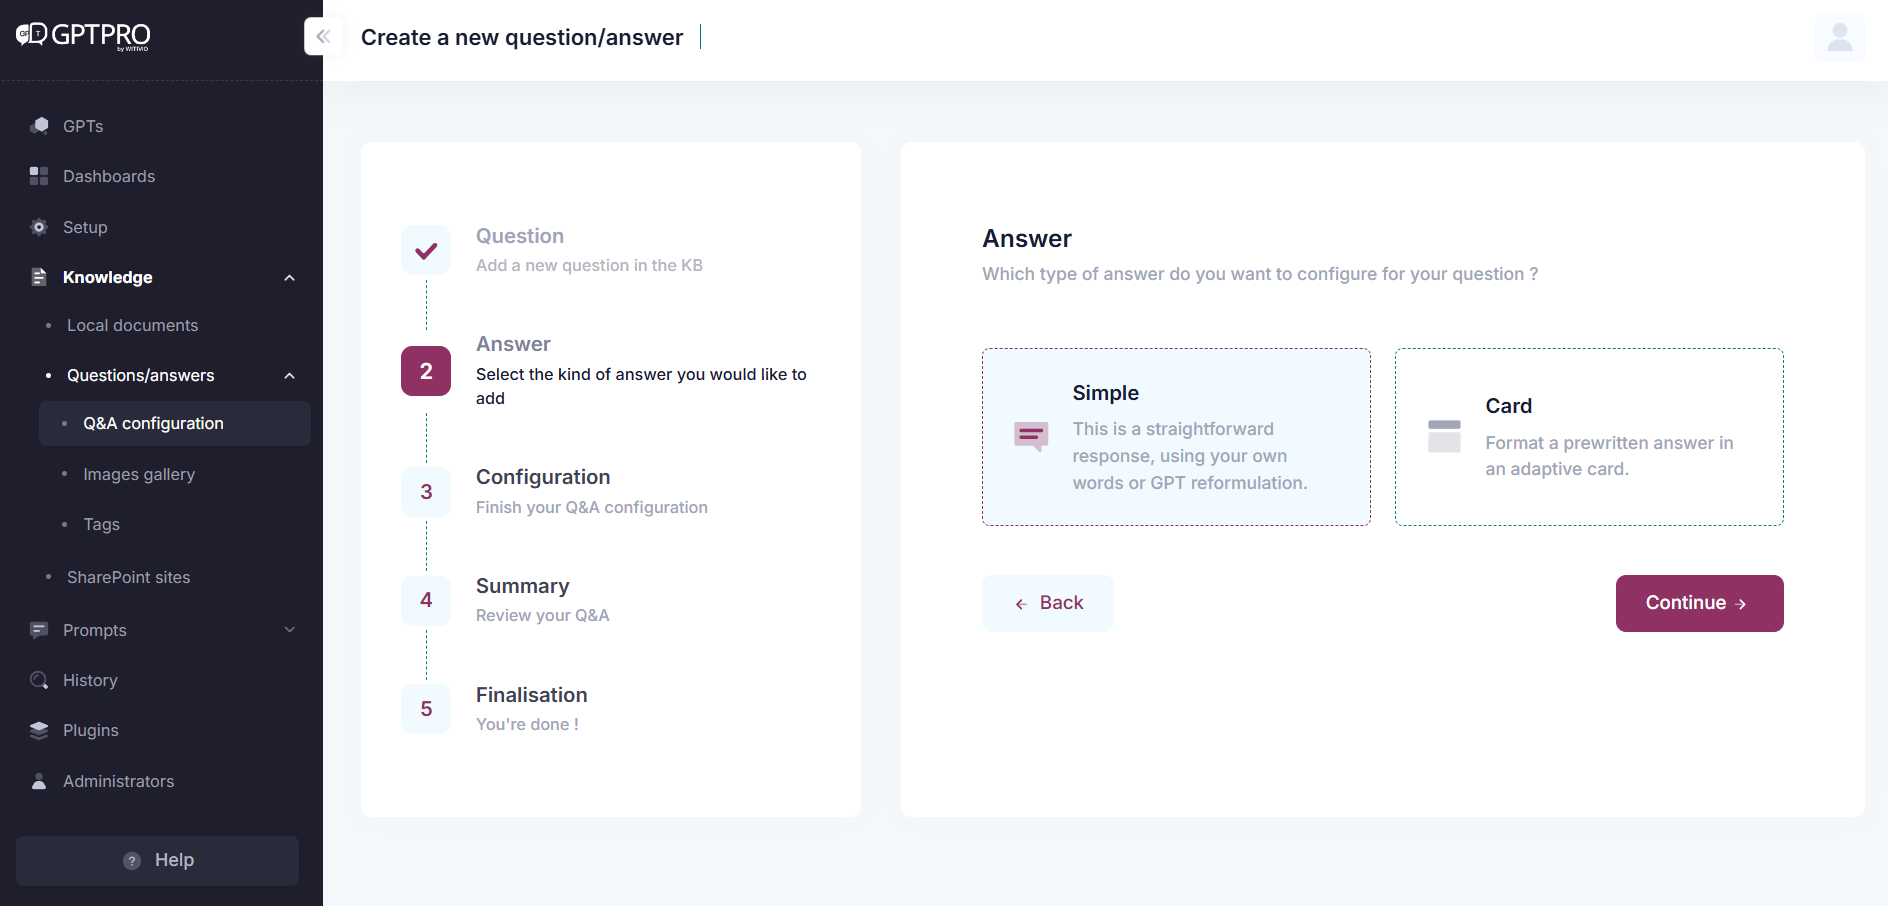
# Simple answer:
Set-up the configuration: Have the possibility to set up your answer to be registered as it is or be added in the context of AI's response and indexed in the reference, also add tag to the question to better categorize them.
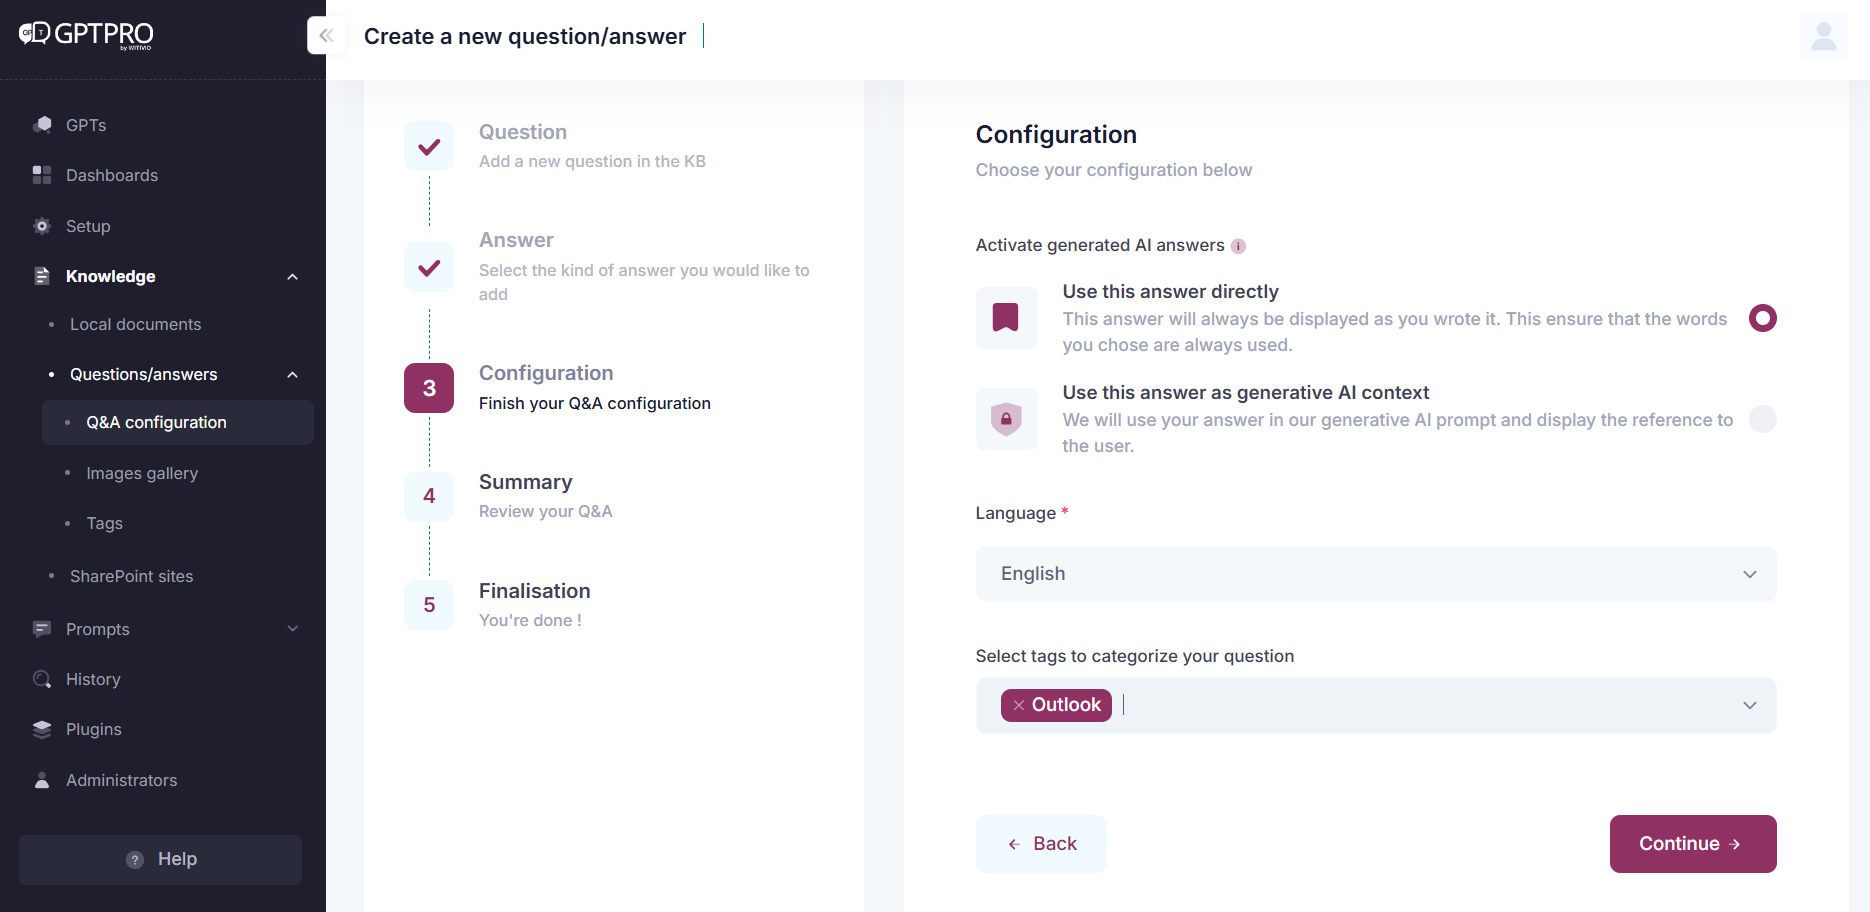
If the 'use this answer directly' option is checked, generative AI will not be used to rephrase the question, and the agent will first check the written answers before searching other sources of information, such as documents or others.
If the 'use this answer as generative AI context' option is checked, the response elements will be used by generative AI in the same way as other information.
It is necessary to select the language of the question/answer. Indeed, with generative AI, the response cannot be translated.
Click on "Submit"
Once saved, it is necessary to write the answer.
Writing the answer: A text editor is available. By default, the answer is in draft mode. An "AI" option is available to help write the message, and the magic wand allows summarizing, improving writing, simplifying language, and changing tone or style.
Save by clicking on "Save". It's possible to preview the anwser cliking on "Preview in Microsoft Teams".

- Publication: To publish an answer and make it available to end users, go to the relevant question and click the "Publish" button at the top right of the question. Once published, the "Unpublish" button appears, allowing you to unpublish the answer at any time.
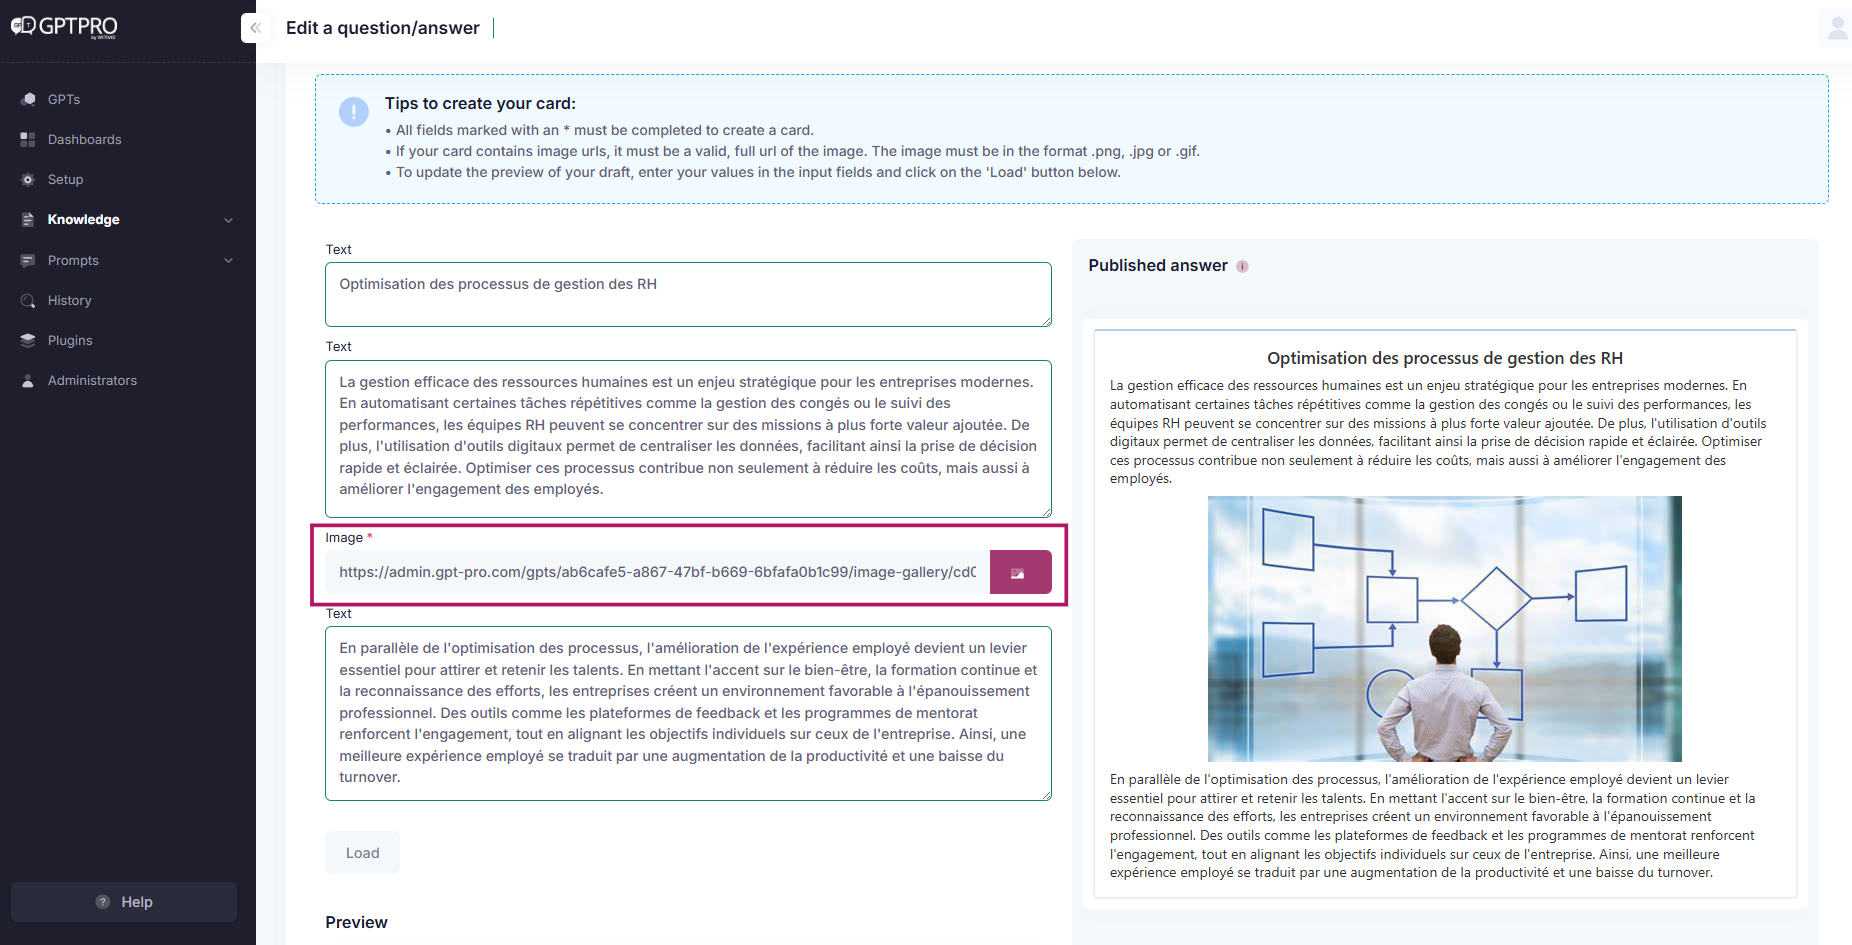
# Card answer:
Card anwser allows to add title, images, buttons.
- Set-up the configuration: Choose the card template in the list of choices.
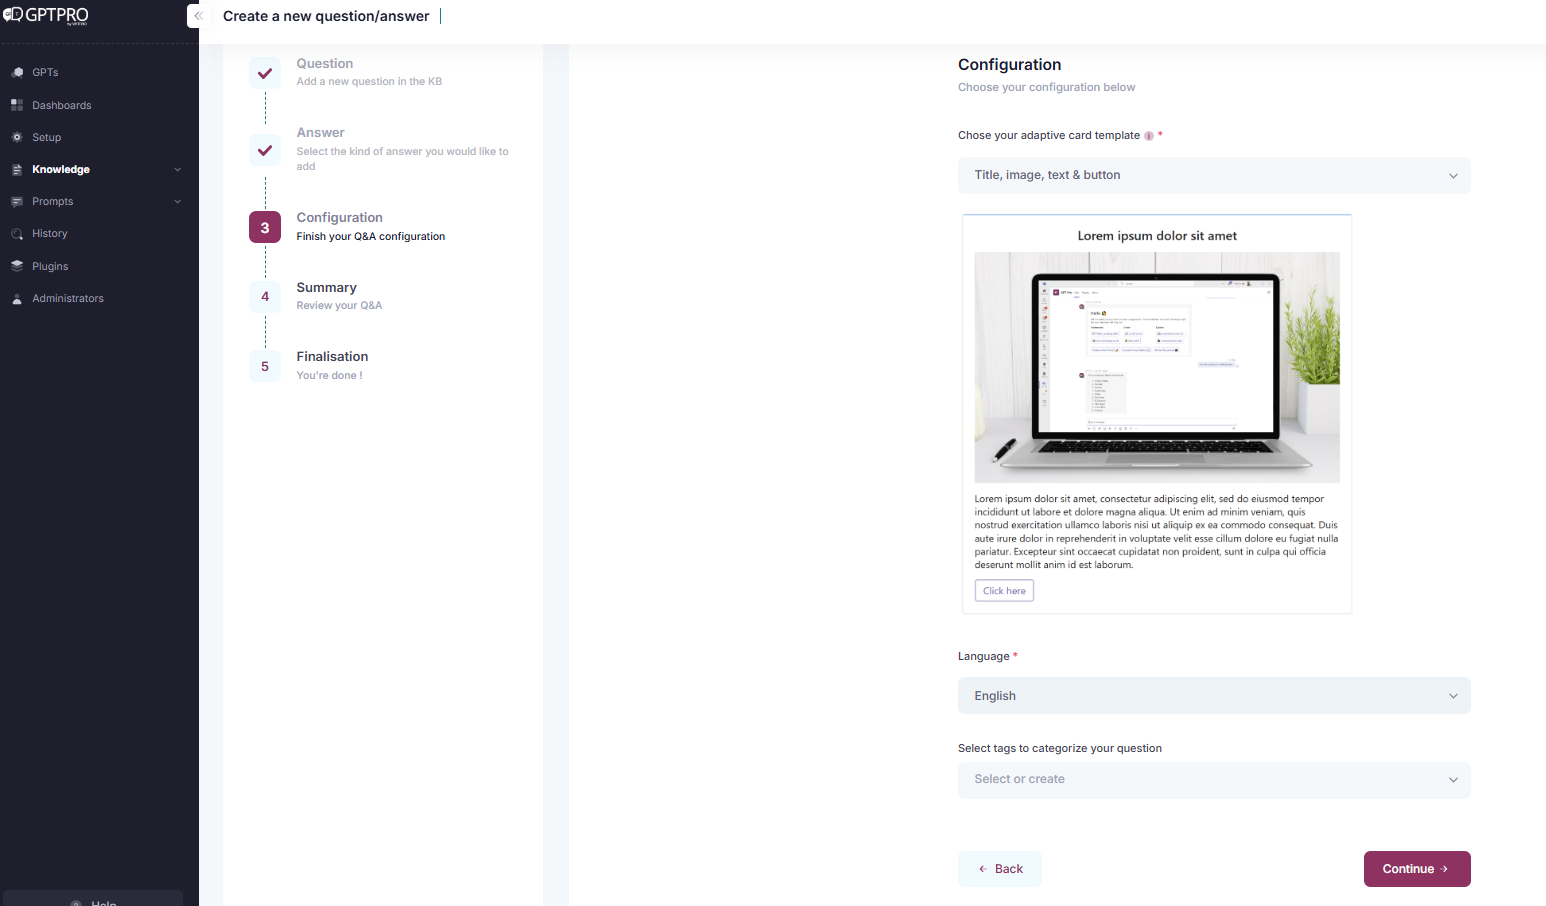
- Select the language, card responses cannot be used as context for generative AI and will be displayed exactly as written. Also add tag to the question to -better categorize them.
- Click on "Submit"
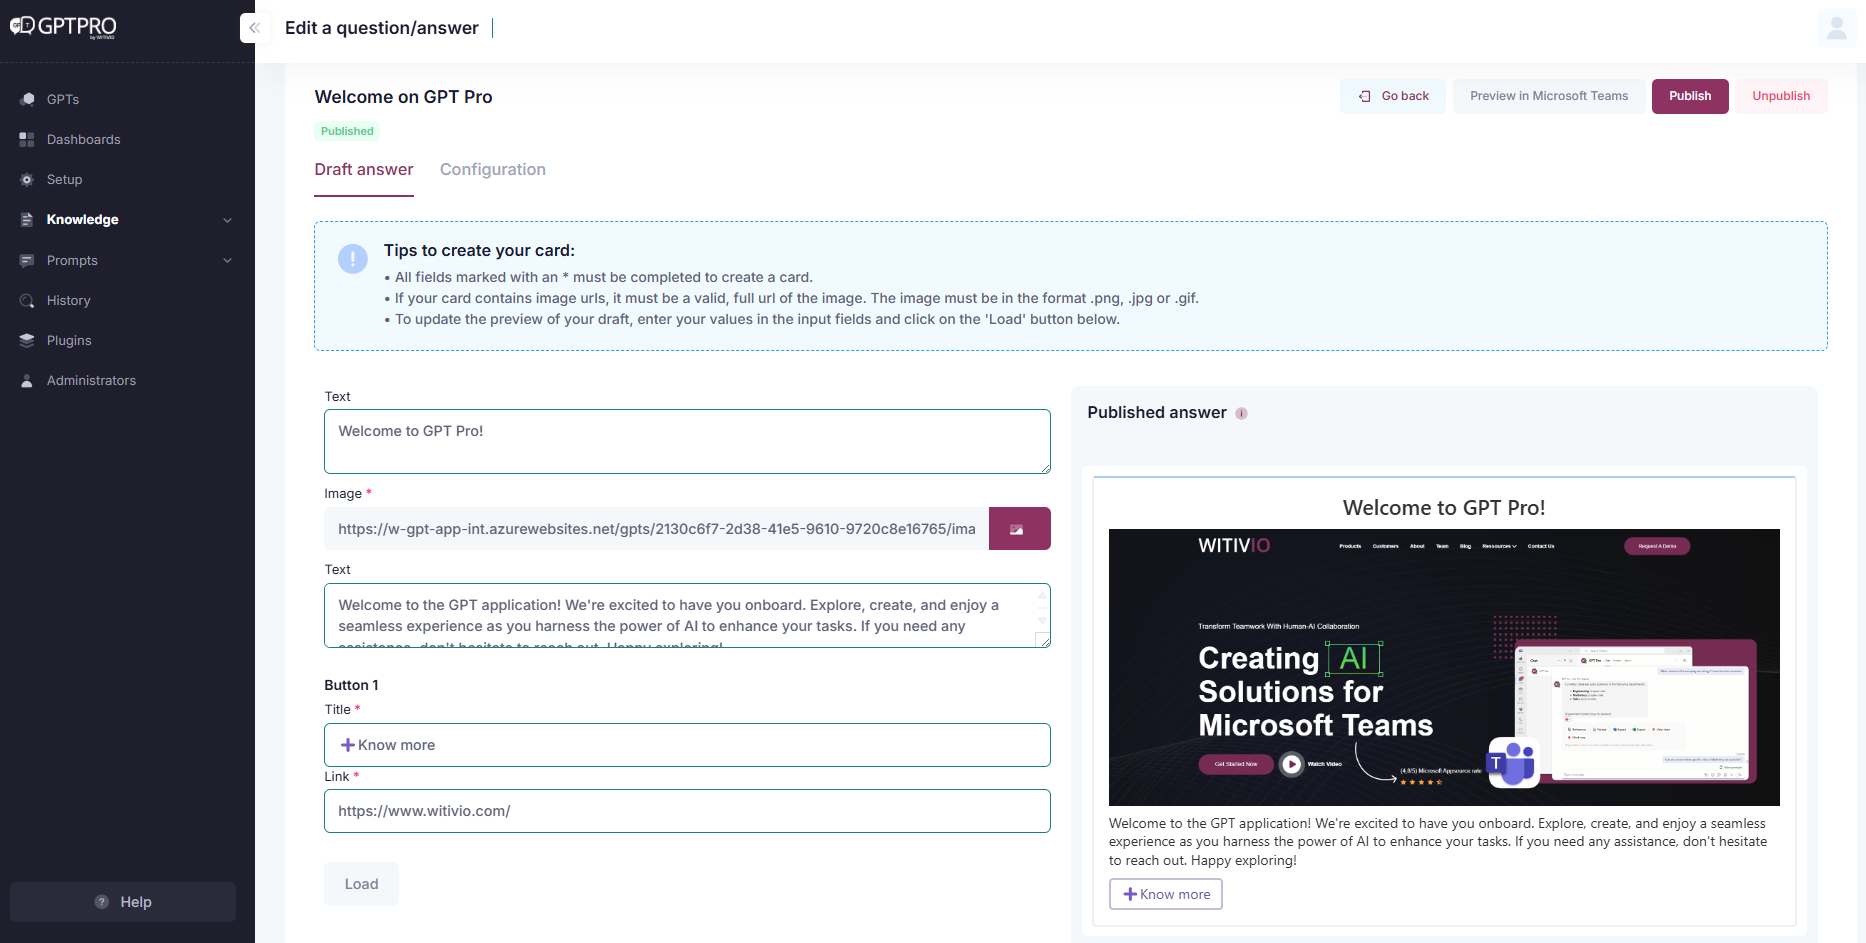
Once saved, it is necessary to write the answer. - Writing the answer: A text editor is available. By default, the answer is in draft mode.
- Save by clicking on "Save". It's possible to preview the anwser cliking on "Preview in Microsoft Teams".
- Publication: To publish an answer and make it available to end users, go to the relevant question and click the "Publish" button at the top right of the question. Once published, the "Unpublish" button appears, allowing you to unpublish the answer at any time.
TIP
💡 If a similar question already exists, a message saying "We found a similar question" is displayed when adding a new question.
# Dialog:
Dialog anwser in GPT Pro enable the creation of dynamic, multi-step conversations through a no-code visual editor. These flows help guide users through complex scenarios using conditional logic, variables, API calls, and user input collection.
# Accessing the Dialogue Editor
- Navigate to the GPT Maker section of your admin panel.
- Go to Questions/Answers and click + Add question.
- Choose the type Dialog.
- Click on the created question to open the visual Dialog Editor.
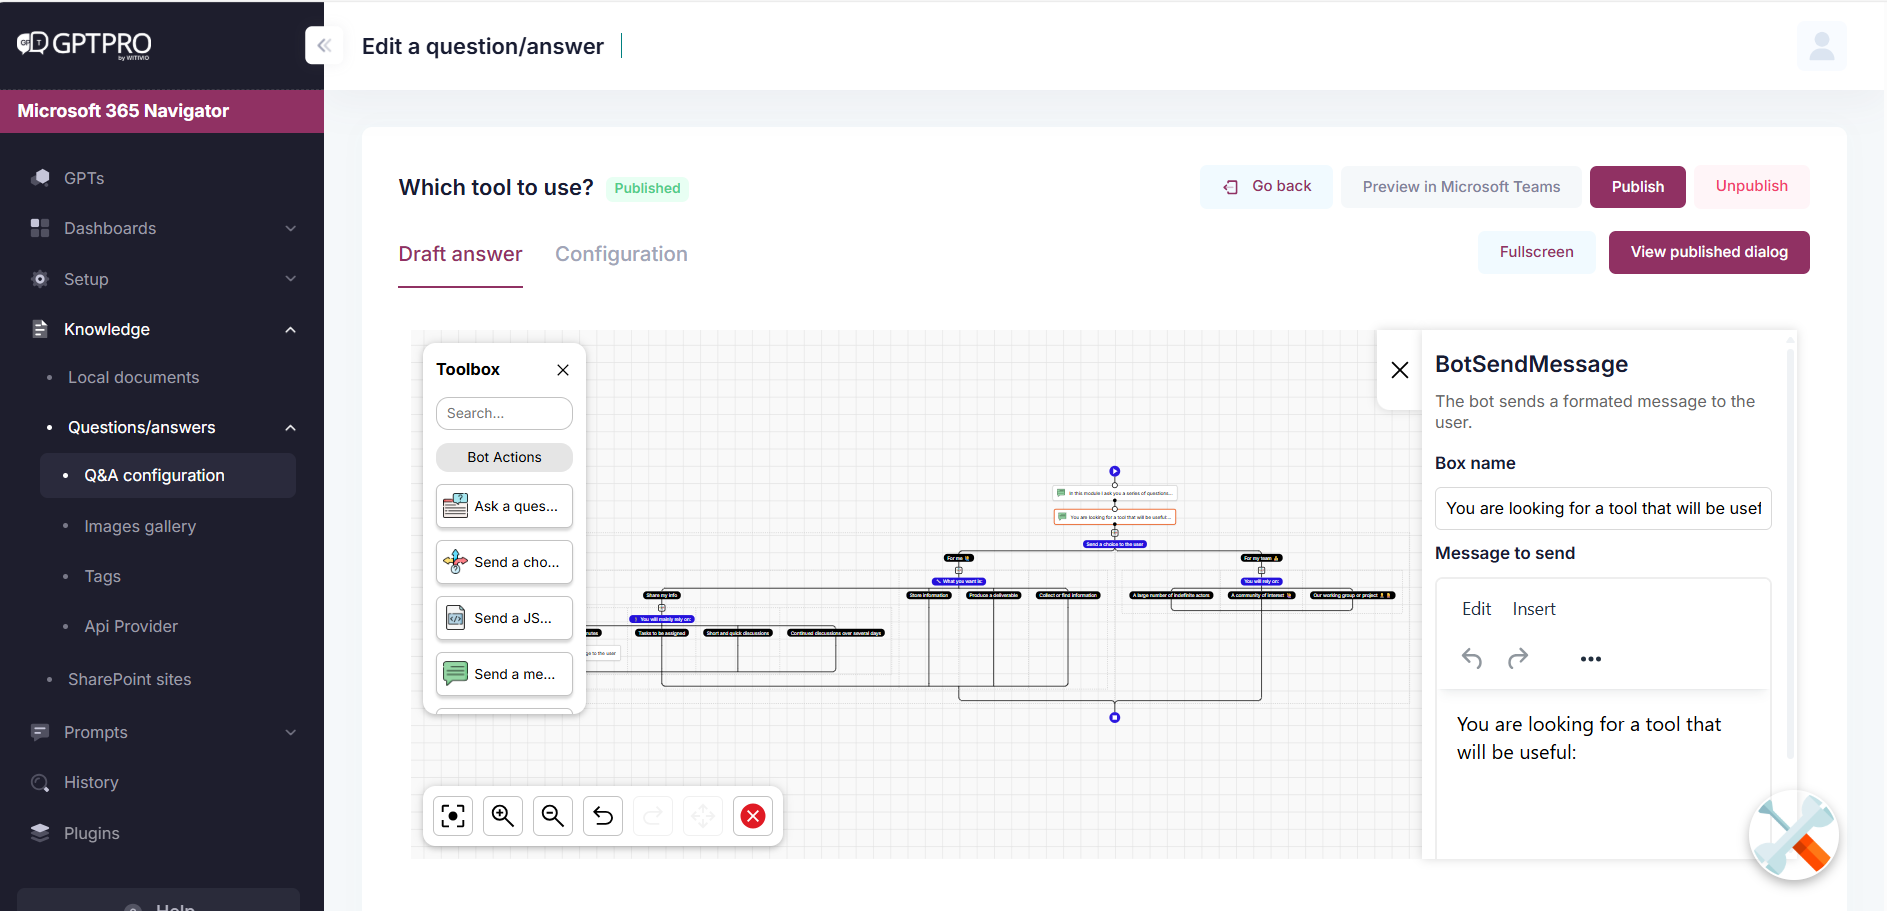
# Building the Dialogue Flow
Use the drag-and-drop interface to assemble conversation blocks into a logical path. These blocks represent various actions or messages within your conversation.
# Available Components
# Send a Choice
- Allows the user to pick between multiple options.
- In the side panel, click + branch to add more options.
# Send a Message
- Displays static text content.
# Send a JSON
- Sends a structured JSON payload (useful for integrations like adaptive cards).
# Send an Image
- Displays an image directly in the chat.
# Start Another Dialogue Question
- Triggers a new dialogue question from the flow to promote reusability.
# Ask a Question
- Prompts the user for input.
- Mandatory: Assign a variable name to store the answer for use later in the flow or for processing.
# Add a Pause
- Adds a timed delay to make the flow feel more natural.
# Add a Variable
- Set or update a variable dynamically.
# Call an API
- Makes a call to an external API.
- Requirement: The API must be defined under
QnAs > API Providers. - Select the appropriate API from the dropdown.
# API Conditions
- Add logic to guide the flow based on the API response.
# Editor Options
# Full-Screen Mode
- Click "Enter full screen" to expand the editor view.
# Saving and Publishing
- Click Save to record your work.
- Then click Publish to make the dialogue accessible to users.
- After publishing, you can compare the Draft vs the Published version to track changes.
# Best Practices
- Always assign variables when using the Ask a Question block.
- Preview and test your flow with real user cases.
- Use modular questions and sub-dialogues for better maintenance.
- Be mindful of API error handling and define fallback paths.
# Example Scenario: IT Support Request
- Prompt user to select a type of IT issue.
- Display guidance or ask follow-up questions based on their choice.
- Trigger an API call to create a ticket in your ITSM tool.
- Show confirmation message with reference number.
This type of flow improves support operations by automating FAQs and ticket creation directly within Microsoft Teams.
# Editing Existing Entries
- Locate the Entry: Choose the entry you want to edit.
- Edit Information: Click on the entry to open it and make the necessary changes on the draft
- Save Changes: Click on
Saveto update the entry, once saved the updated input will be showcased on the published tab..
# Step 2 : Manage gallery
To maintain an organized card image, a gallery is available: an image must be added to the gallery before it can be used in a card.
# Add a to a question:
- Select an Entry: to add an image to a question, open the card question, click on the image icon, and select the image from the available folders.
- Save: Click on
Saveto apply the changes.
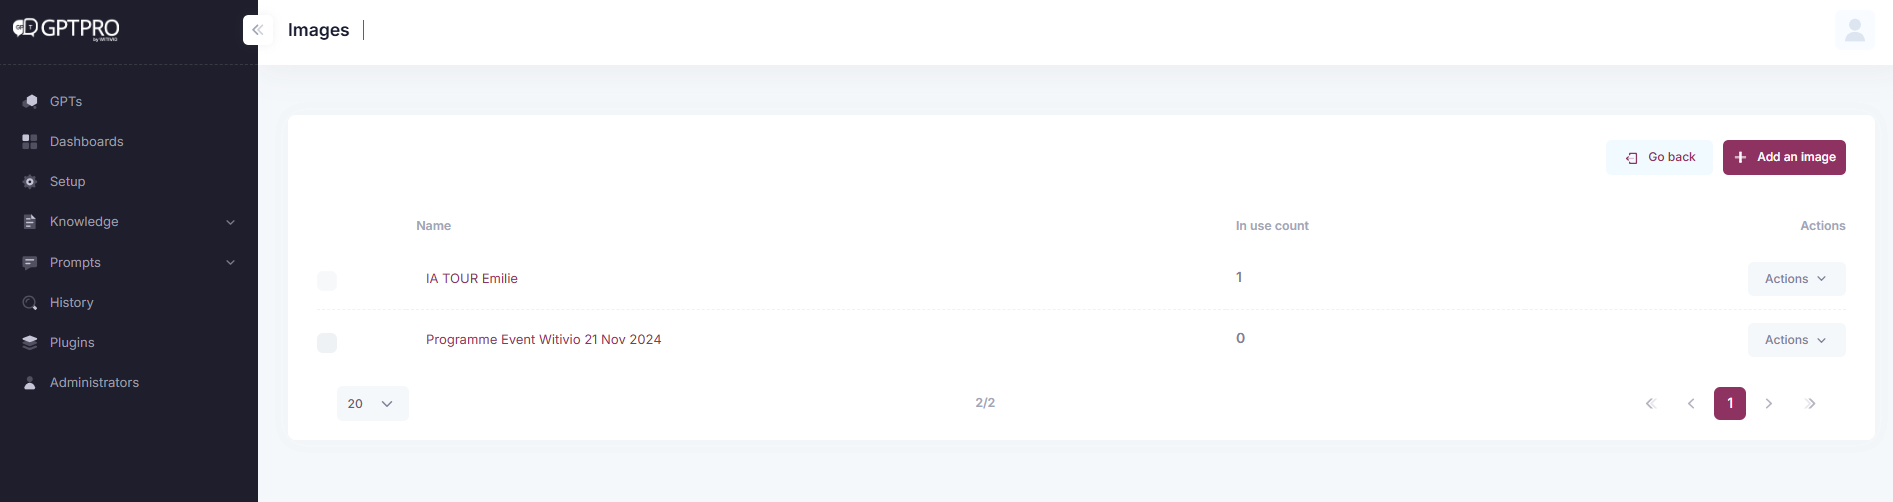
# Manage images
- Access tags management: Choose 'Images gallery' tab
- Add a new folder: Click on '+Add a folder' to create a new folder.

To perform an action, click on 'Actions' next to the folder. From there, you can view and manage images, edit the folder's name, and delete the folder if no images are used
- Add a new image: Click on '+Add an image' within the folder to add the image.
- View image: Click on the 'Actions' button and select 'View' to see the image.
- Move to: Click on the 'Move to' button and select a folder to move the image to.
- Delete: Click on the 'Delete' button and select 'Delete'. If an image is used in a question, the 'Delete' button will not be displayed.
The image list shows the number of times each tag is used in questions.
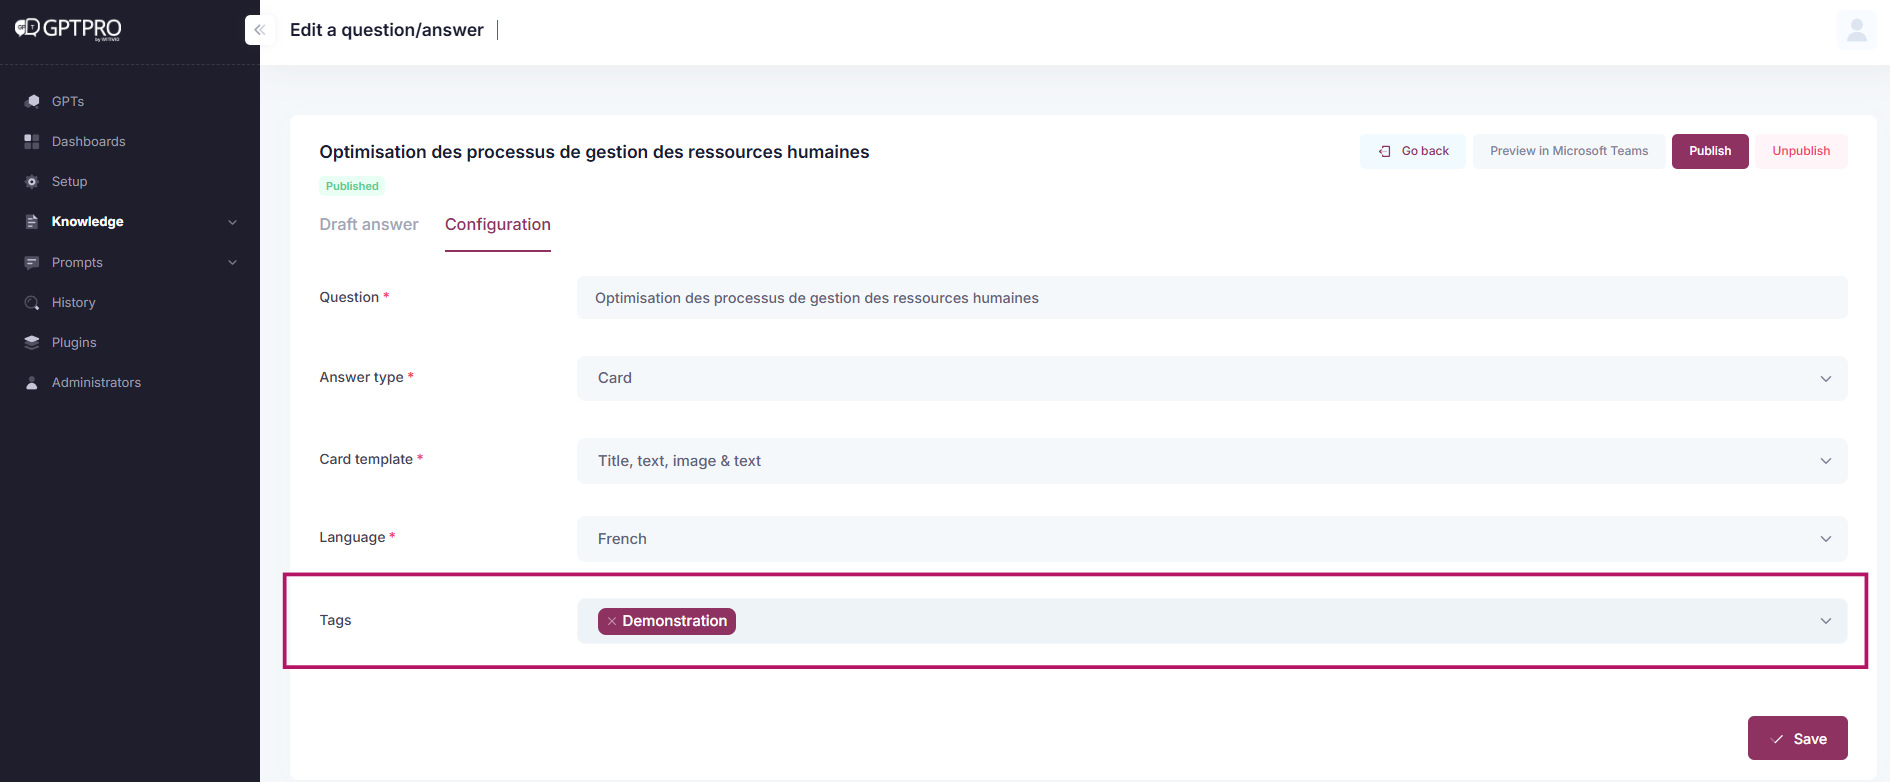
# Step 3 : Create and manage tags
To maintain an organized and easily navigable knowledge base, you can tag entries. Tags can be added directly when creating a question. To add a new tag or manage existing tags, use the 'Tags' tab.
# Add a tag to a question:
- Select an Entry: to add a tag to a question: open a question, choose 'Configuration' and choose or create a tag. Open the entry you want to categorize or tag.
- Save: Click on
Saveto apply the changes.
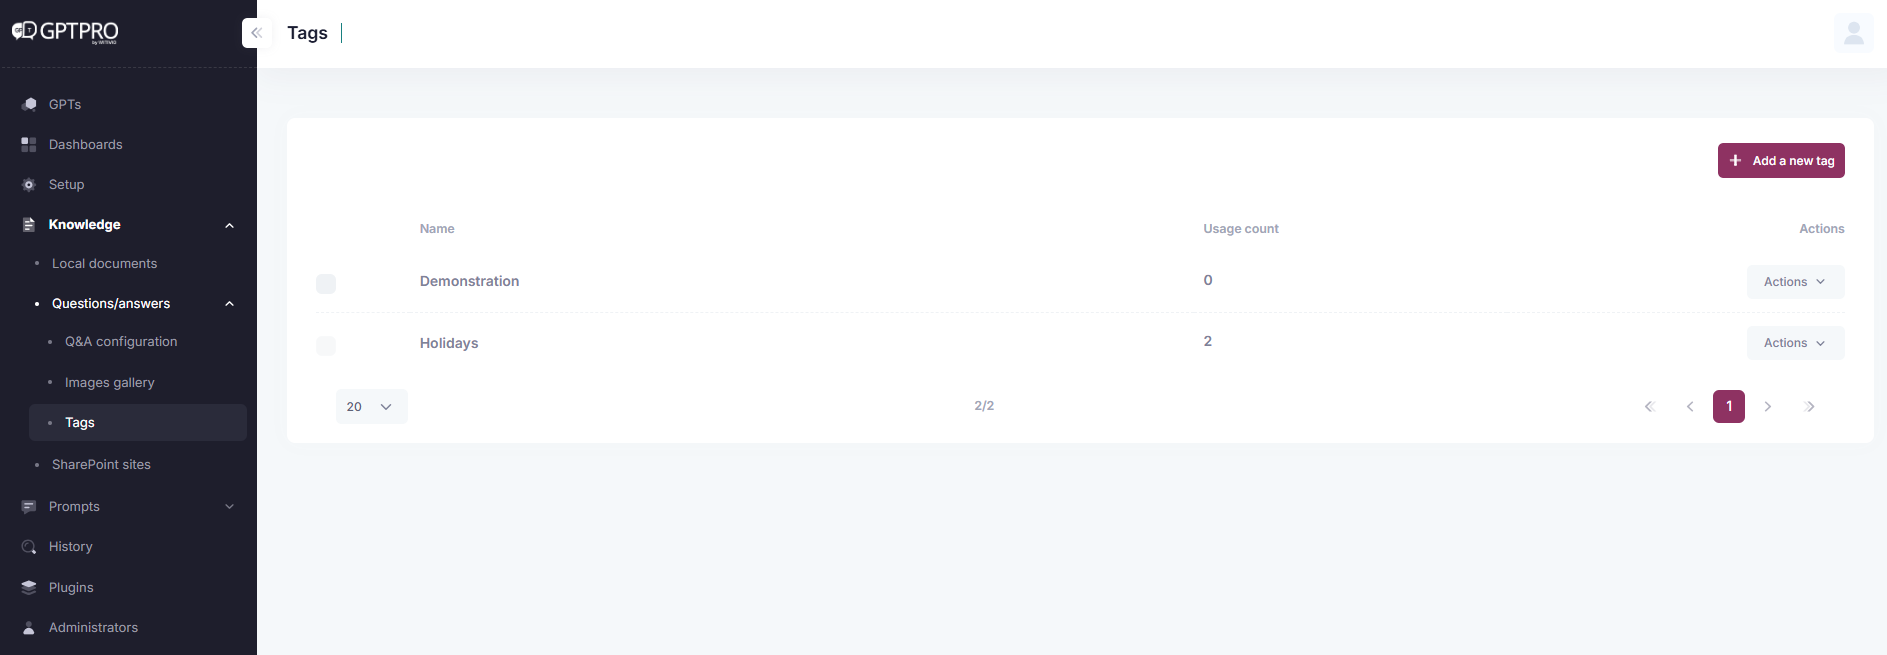
# Manage tags
- Access tags management: Choose 'Tags' tab
- Add Tags: Clik on '+Add a new tag' to add a tag.
- Update Tags: Choose 'Actions' button and click on 'Edit". If the tag label is renamed, it will also be updated on all the questions that contain it.
- Delete Tags: Choose 'Actions' button and click on 'Delete". If a tag is used for a question, the 'delete' button is not displayed.
- Save: Click on
Saveto apply the changes.
The tag list shows the number of times each tag is used in questions.