
# Send Communication through the Chatbot
# Overview
Note: This feature is available only for customers who have subscribed. For more information, please contact a Witivio specialist.
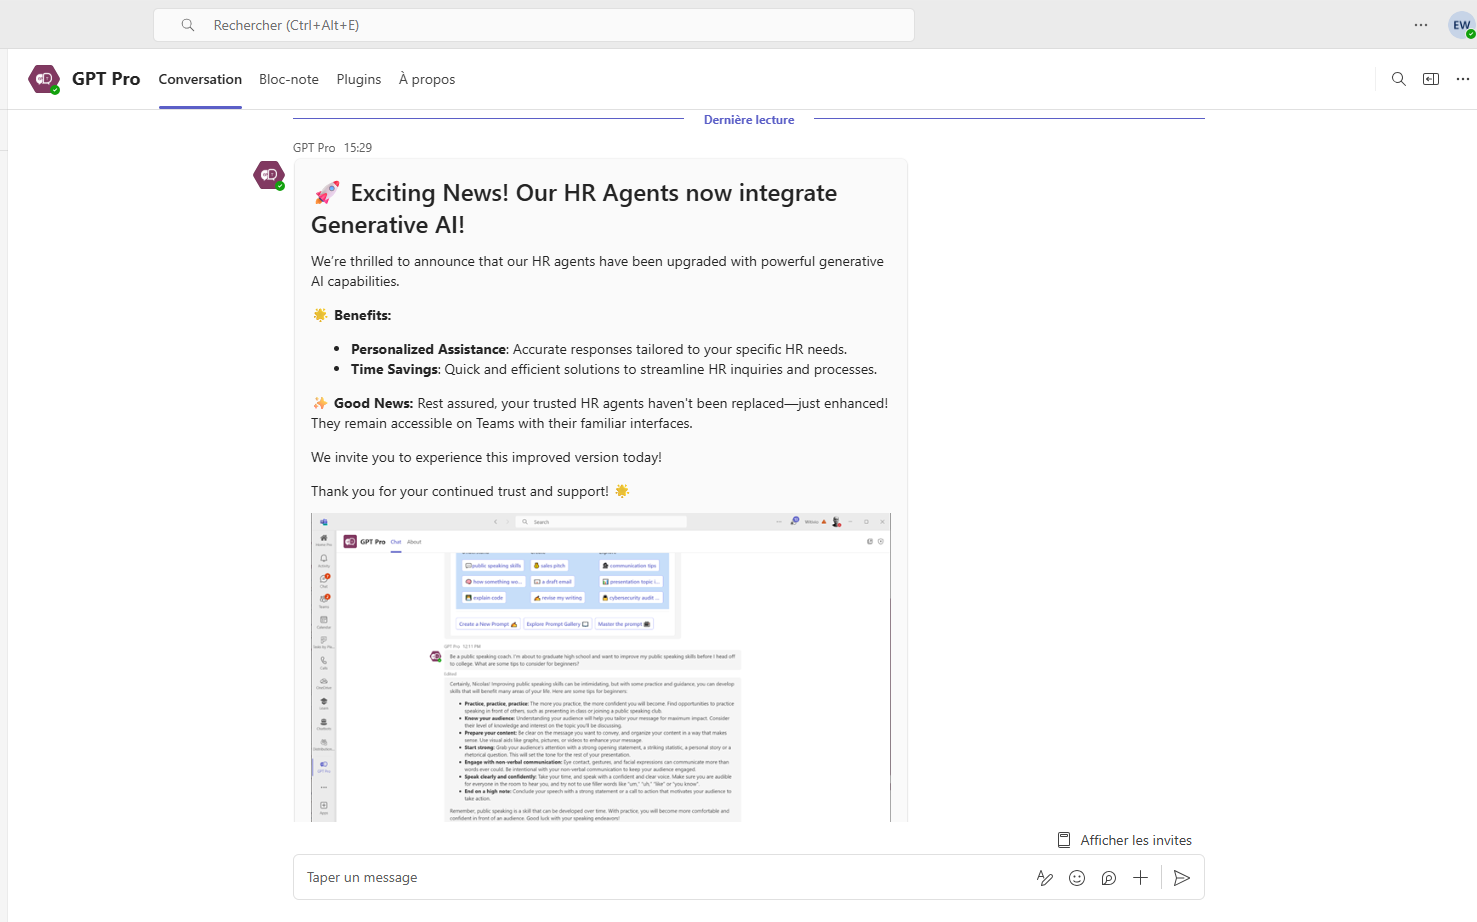
Company Communicator is a feature integrated into GPT Pro that enables proactive and targeted notifications via Microsoft Teams, enhancing internal communication and responsiveness within your organization.
# Key Features
- Targeted notification sending
- Centralized campaign management
- Advanced interaction analytics
# Step-by-Step User Guide
# Connecting to the Application
- Access GPTs, then select the "Communication Tab."
- Log in using your Windows credentials.
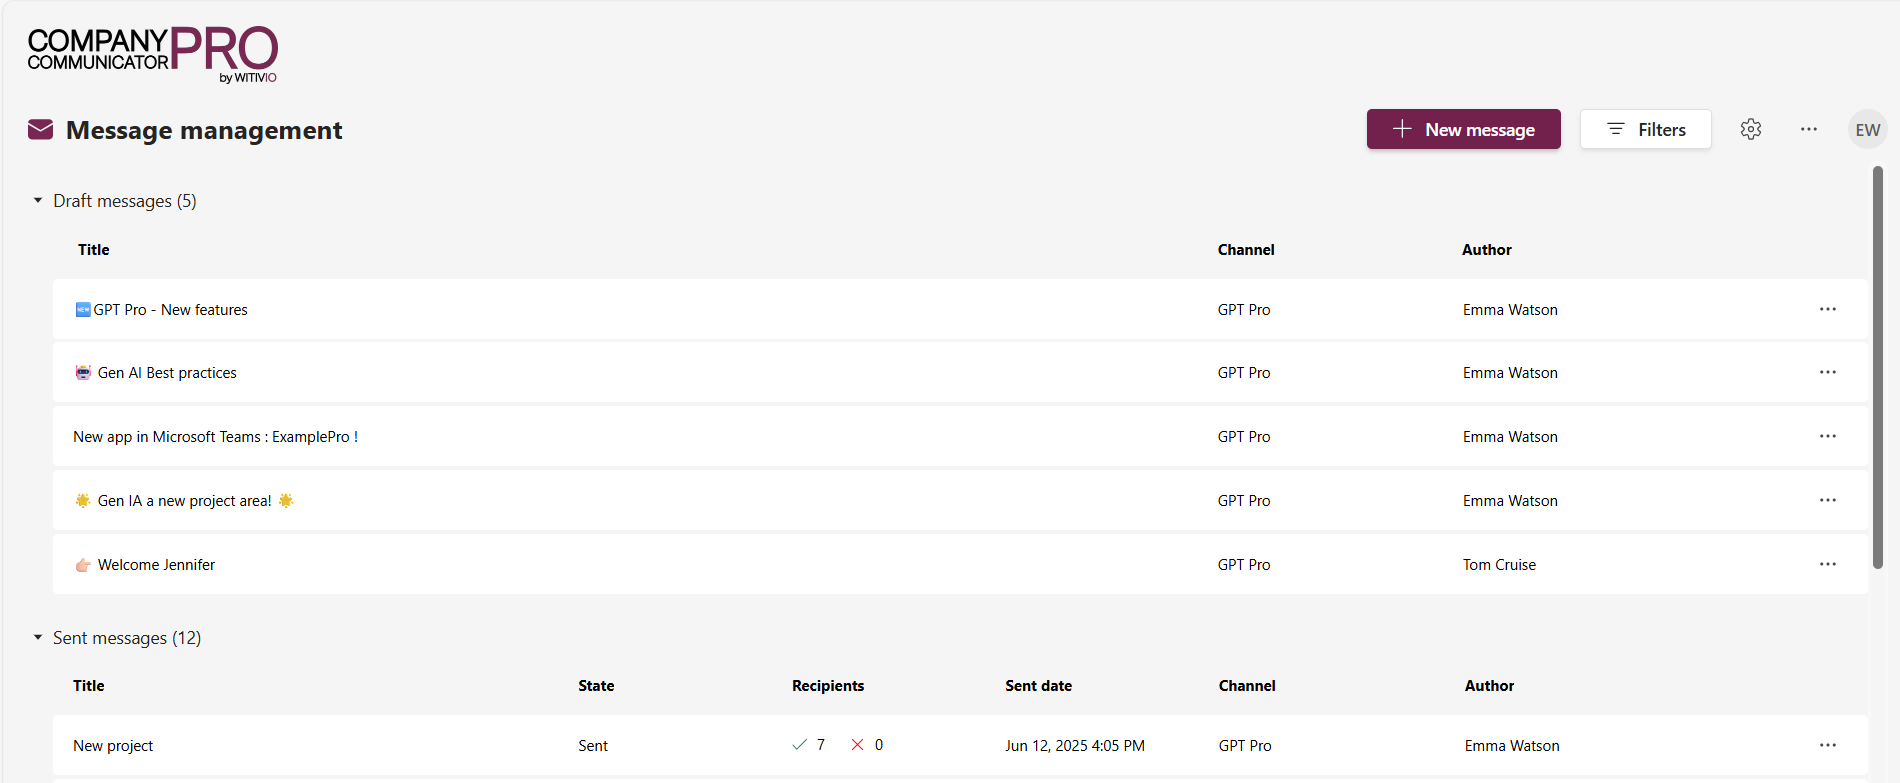
- The application opens on the "Message Management" interface.
# Initial Configuration
# Configuring Topics
- Go to settings and select "Topic."
- Click "Add a topic."
- Enter a title and description.
- Click "Save."
# Managing Images (Gallery)
- Navigate to settings and select "Gallery."
- Click "Add" to upload an image or create a folder.
- Select a parent folder if necessary.
- Name your image or folder, then validate.
- Edit, crop, move, or add an image directly during sending by following these same steps.
# Creating Distribution Lists
- Select "Import a list."
- Download and complete the template with user UPNs specific to your company.
- Note: UPN may not always be identical to the email address.
- Upload your completed file.
# Message Management
# Creating a New Message
- Click "New message."
- Before configuring your message, you must first select the topic and one or more languages.
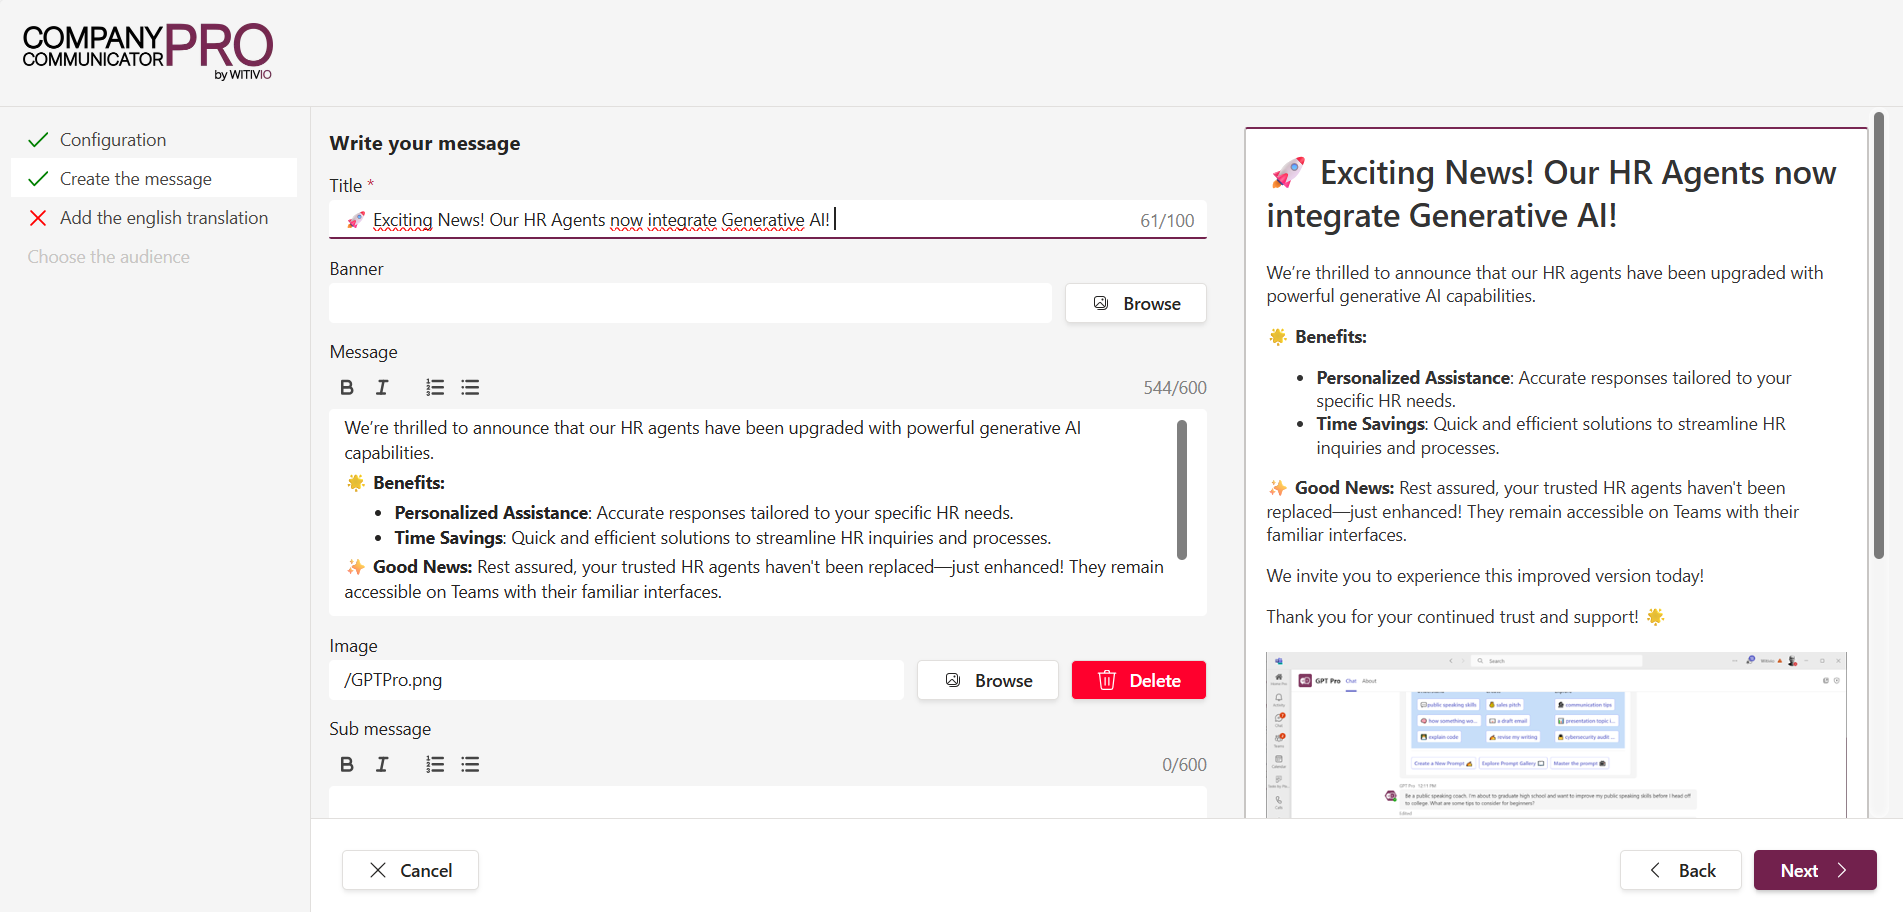
Then, configure your message by completing the following fields:
- Title: Enter a clear and concise title.
- Text: Compose the message you wish to communicate.
- Images: Select or upload an image from your gallery.
- Author: Specify the author of the message.
- Interactive buttons: Optionally add buttons to drive user interaction.
- User feedback option: Activate this option if you wish to collect feedback.
- After configuring the message, click "Next" to proceed.
- Review your message configuration, then click on the "..." icon and select "Send". A summary will appear where you can either click "Send" to deliver immediately or select "Schedule" to set a future date and time for delivery.
# Multilingual Management
- Select the desired languages.
- Create a separate message for each language.
# Audience Selection
- Send to everyone or select a specific preconfigured distribution list.
# Scheduling a Message
- At sending time, click "..." then "Send."
- Choose a future date and time to schedule the message.
# Campaign Dashboard
# Drafts
- Send, edit, duplicate, or delete your message drafts.
# Sent Campaigns
- Check the status of sent campaigns, number of recipients, failures, and send date.
- Access detailed reports and statistics.
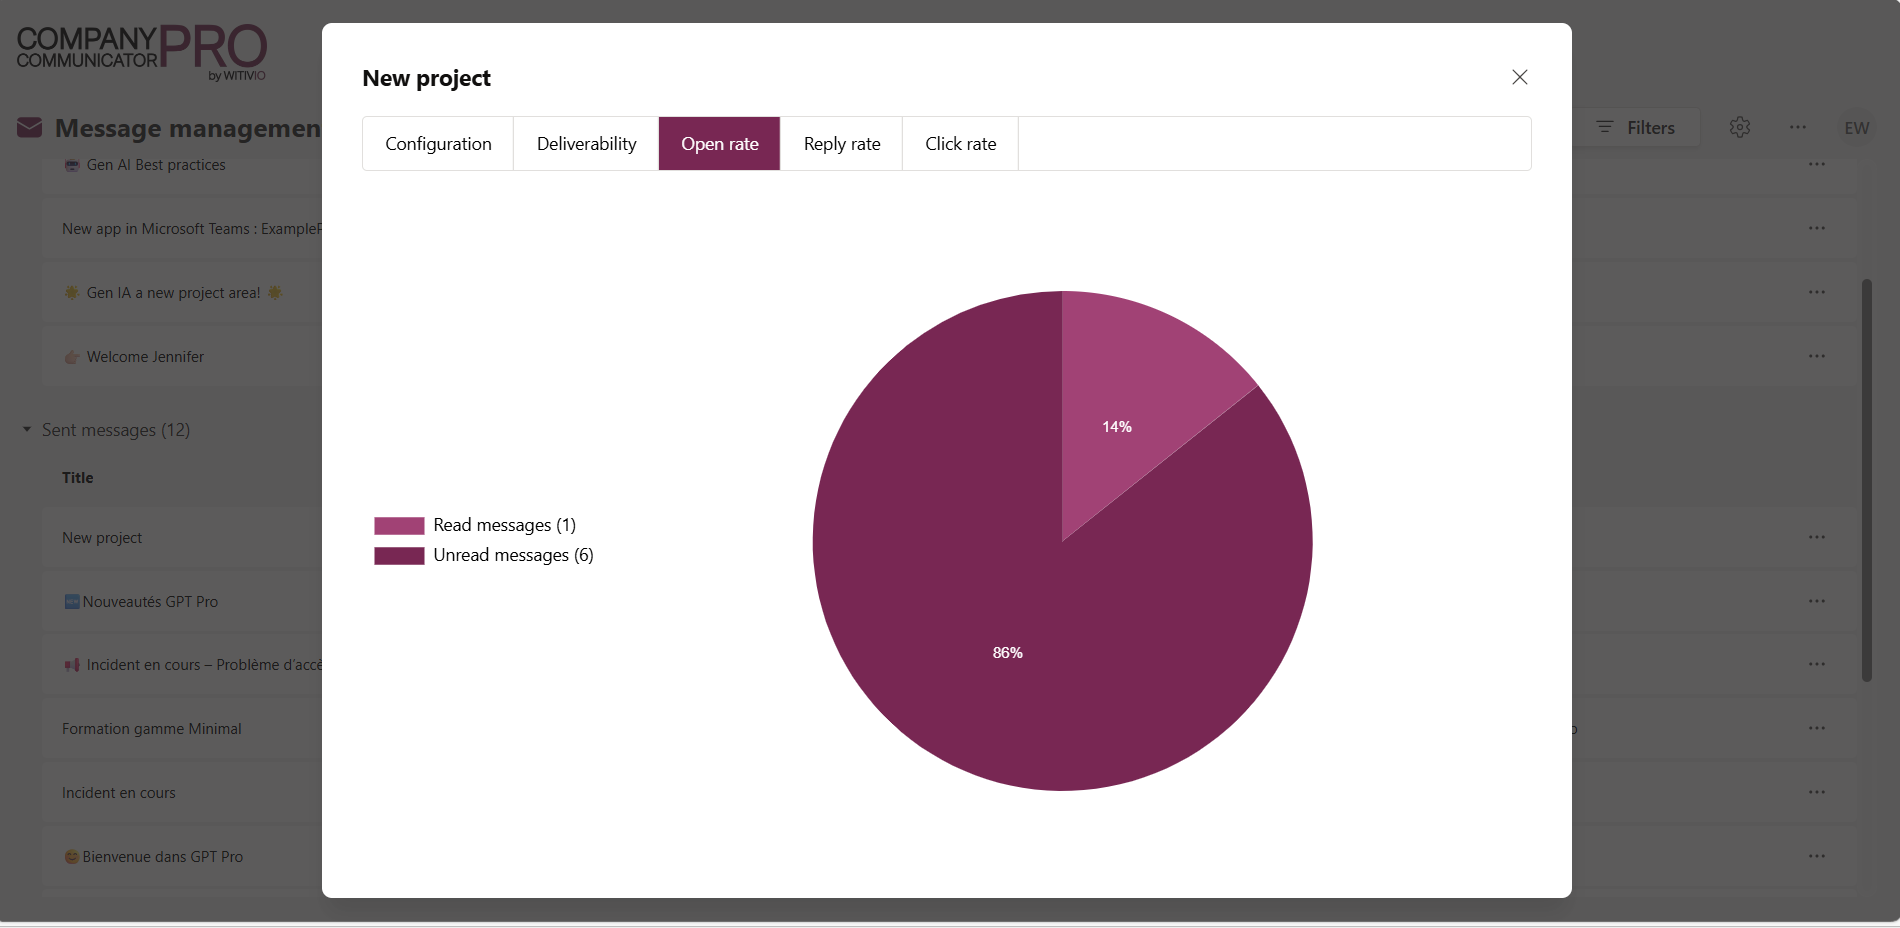
# Detailed Statistics and Analytics
# Campaign Reports
- Filters: filter campaigns by GPT or author.
- General Information: quick overview of essential data.
- Deliverability:
- View the status of sent messages.
- Resend to recipients who have not opened (beware of potential spam).
- Export data via the "Export" button.
- Open Rate: clear distinction between read and unread messages.
- User Feedback: detailed, exportable distribution of user feedback.
- Click Rate: detailed analysis of interactions with buttons included in messages.
# Best Practices
- Always set up your topics and images before creating messages.
- Always use distribution lists for optimal targeting.
- Regularly review statistics to adjust campaigns based on user feedback.
- Avoid spam by cautiously using the resend feature.
# Security and Privacy
- Secure authentication via Windows ID.
- Full compliance with access rules defined by your organization.