
# Required prerequisite Skype for Business Online
# User creation
Before you start, in your Office 365 administration center https://portal.office.com/adminportal/ (opens new window), create a user with a password for the chatbot.
💡 Good Practice
- Verification: the password never expires
- Uncheck: the user must change the password at the next login
- License Skype for Business
# Azure Active Directory
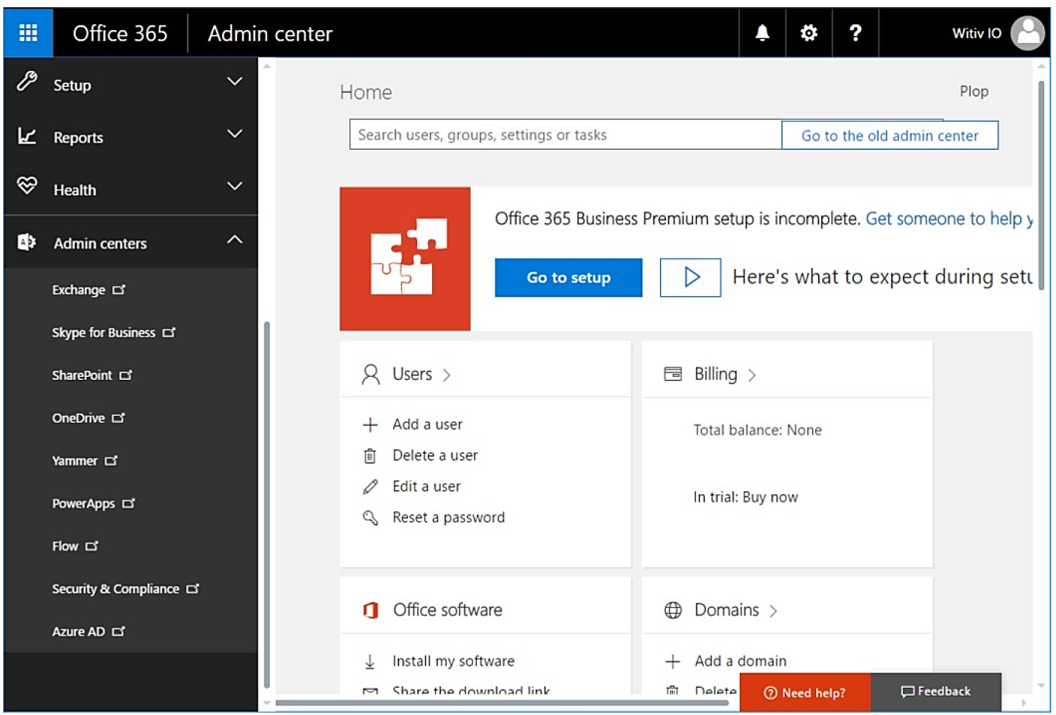
Log in to your Office 365 administration center https://portal.office.com/adminportal/ (opens new window)
- Select Administration Center in the left panel.
- Select Azure AD
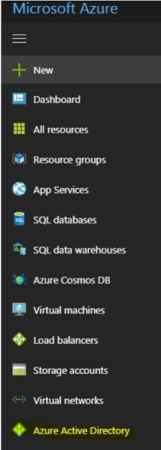
You are forwarded to https://portal.azure.com/ (opens new window).
Select Azure Active Directory in the left panel.
- Select Apps registration in the left panel.
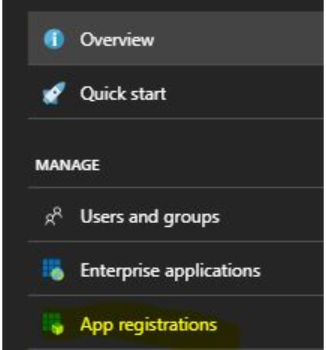
- Select New application registration

- Insert the following configuration and choose Create
| Name | WitivioConnector |
|---|---|
| Application type | Native |
| Sign-on URL | https://www.witivio.com/s4b (opens new window) |
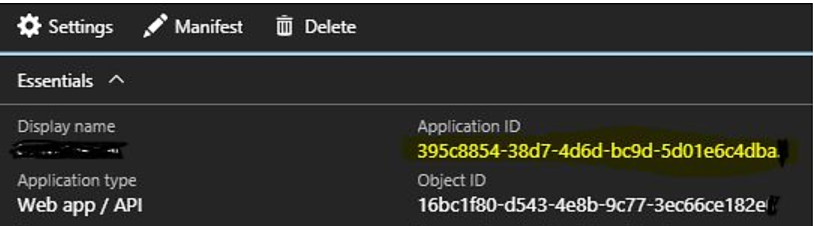
- Select WitivioConnector from the list of applications.
- Copy the application ID
- Select Required permissions in the right panel.
- Select Add
- Select Select an API
- Select Skype for Business Online
- Select Select permissions
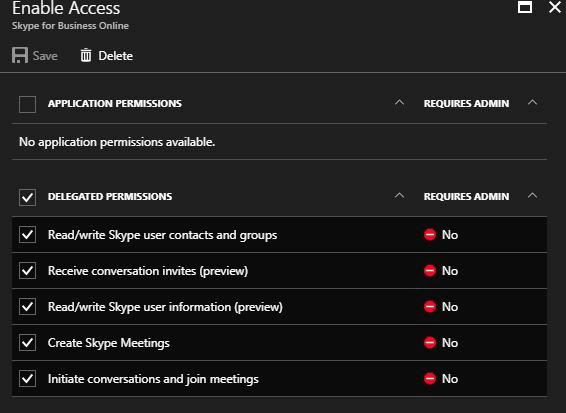
- Select all elements in the section Delegated permissions
- Select Save
# Allow an Azure AD application
Copy this URL into the notepad:
https://login.microsoftonline.com/common/oauth2/authorize?response_type=id_token&client_id=[APPIDingeredirect_uri=https:/www.witivio.com/s4b&response_mode=form_post&form.online.lync.com & prompt=admin_consent
Replace the word [APPID] with the application created previously.
Copy-paste in a browser.
Log in as an Office 365 administrator.
Allow permission.