
# Managing permissions in Reminds Pro
Permissions control who can add, modify, and delete reminders in a shared Reminds Pro list. You can apply one mode to everyone in the channel, restrict changes to owners, or set rights member by member. This page shows how to set permissions and how each mode works.
# Permission modes
Reminds Pro offers three permission modes. One mode is always selected, and by default everyone in the shared space can manage reminders.
# Set the permissions
- 1
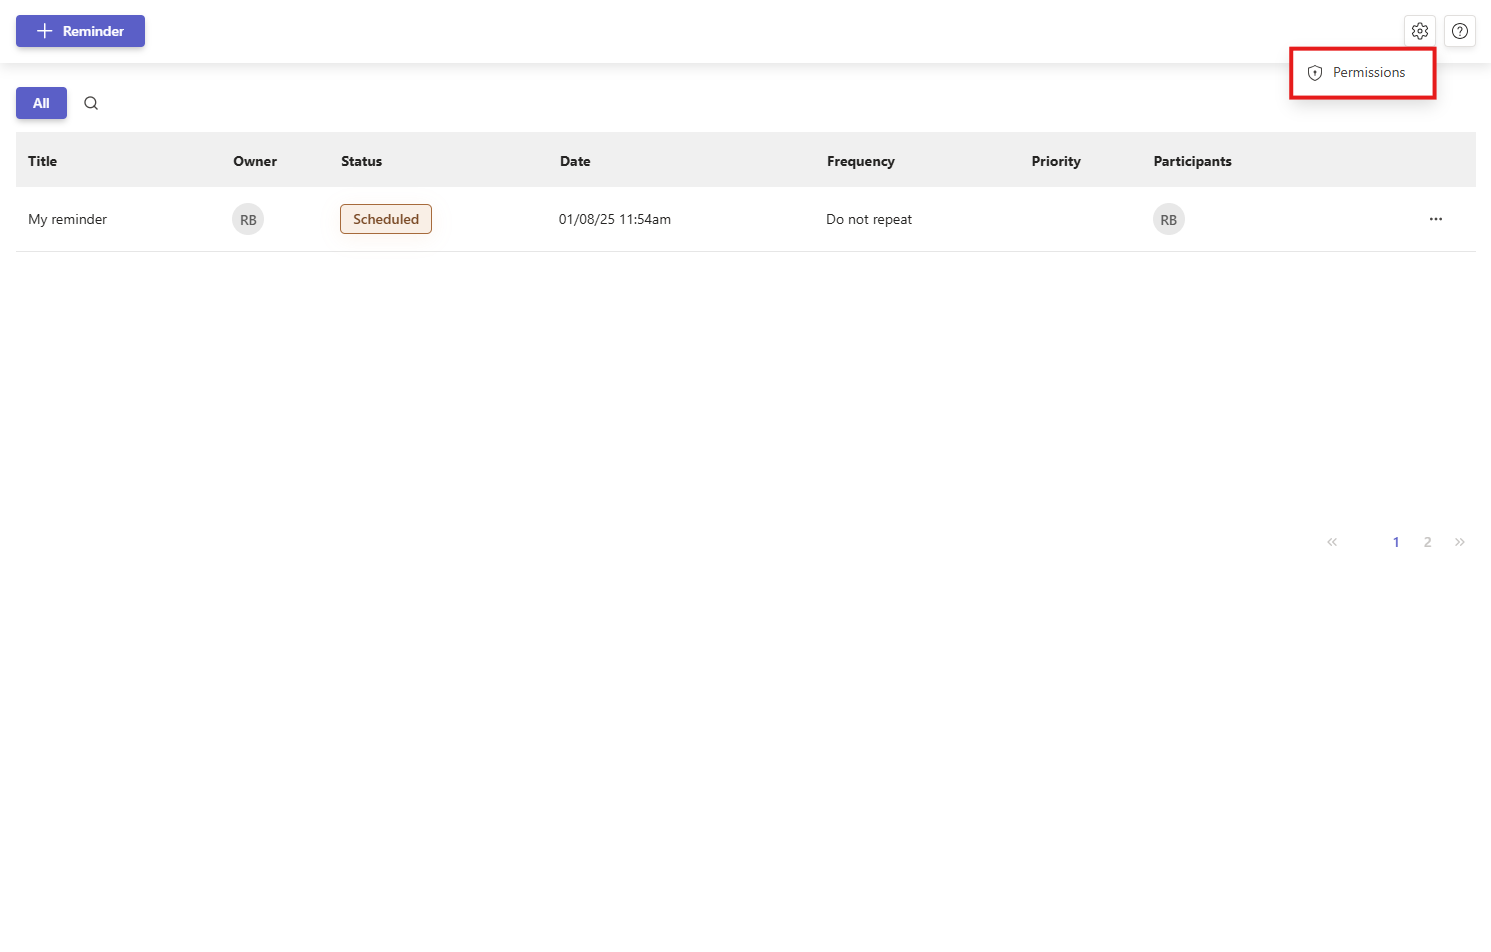
Open the shared Reminds Pro tab and click the Settings icon in the top-right corner.
- 2
Select Permissions from the menu.
- 3
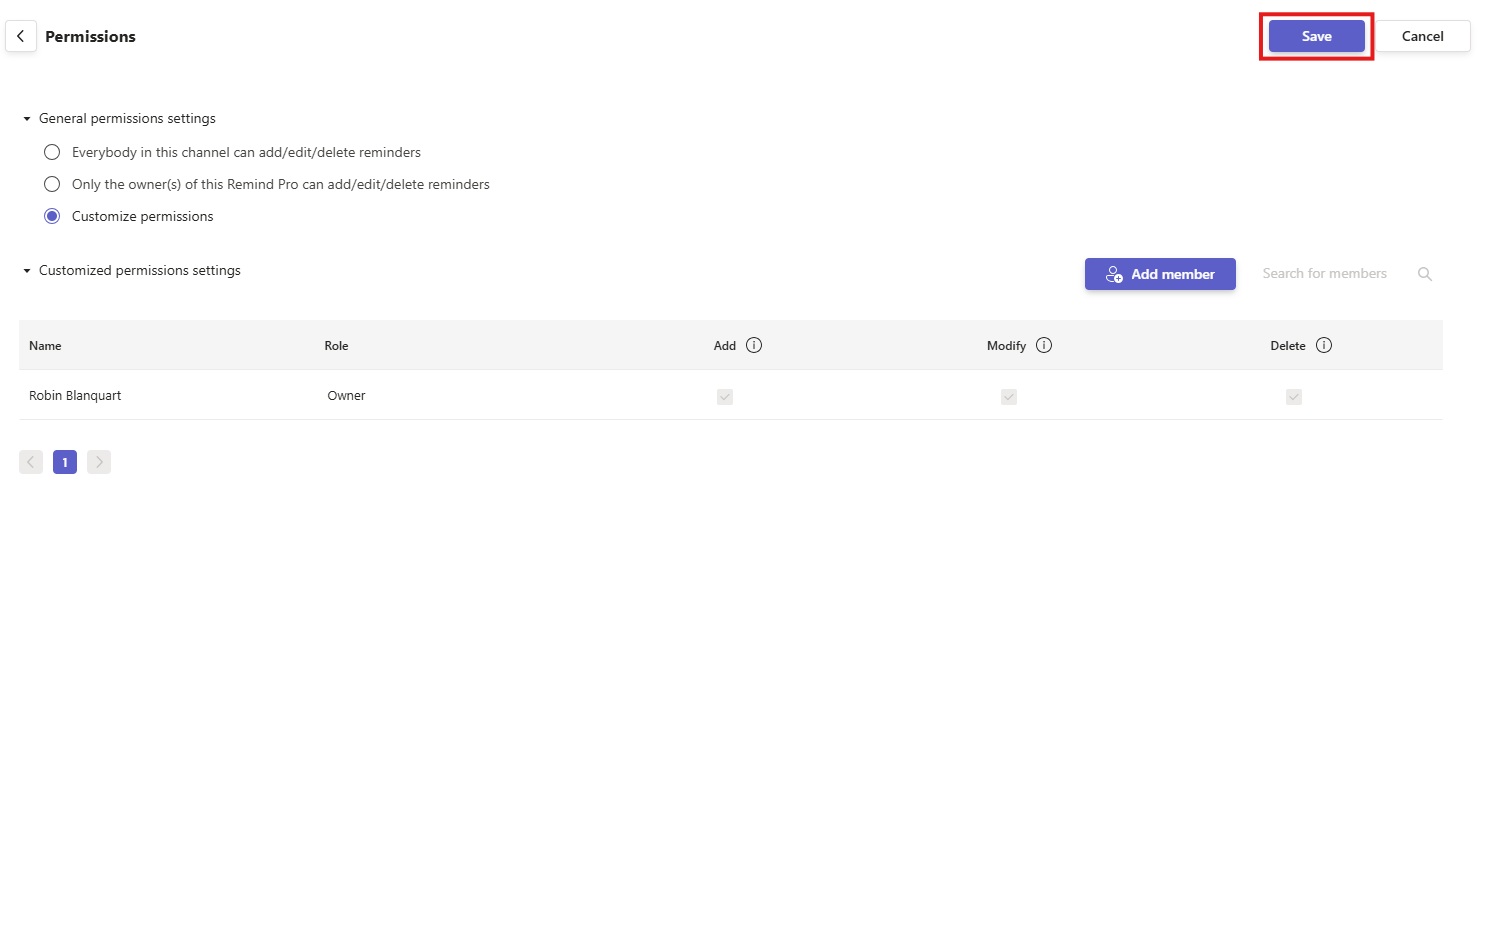
Choose a permission mode: Everybody in this channel can add/edit/delete reminders, Only the owner(s) can add/edit/delete reminders, or Customize permissions.
- 4
Click Save to apply the change.
# Customize permissions per member
Custom permissions let you tune rights for each person. When you select this mode, a second section opens with a per-member table where you can grant the Add, Modify, and Delete rights individually.
- 1
In the Permissions settings, select Customize permissions to open the per-member table.
- 2
Click Add member and use the search bar to find and add each person you want to grant rights to.
- 3
For each member, select the checkboxes for the rights you want to grant: Add, Modify, and Delete.
Each row also shows the member subscription level, for example Platinum.
- 4
Click Save to apply the changes.
# Good practices
- Review regularly: Check permissions often so they match current team roles and responsibilities.
- Limit access: Grant rights only to the people who need them to keep control of the reminder list.
- Clear roles: Define roles and share them with your team to avoid confusion.
# Related pages
- New to the app? Start with installing Reminds Pro in Microsoft Teams.
- Learn how members create reminders in adding a new reminder.
- Need the app identifier for support? See how to get the Reminds Pro id.