
# Gantt Chart Pro – Get Started Guide
Welcome to Gantt Chart Pro, your interactive Gantt app for Microsoft Teams. This guide gives you a quick overview and the core features so you can plan and visualize projects directly inside Teams.
# Overview
Gantt Chart Pro lets teams build clear, interactive timelines right in a Teams tab. Create tasks and subtasks, set dependencies and milestones, color-code work, assign participants, and track progress without leaving Teams. You can also export a snapshot of your plan when you need to share or archive it.🔄🗂️
# Key Features
Interactive Gantt charts in Teams: Visualize timelines and adjust schedules directly in a channel tab.
Tasks & subtasks: Break work down for clarity and ownership.
Milestones & color-coding: Highlight key dates and visually classify tasks at a glance.
Dependencies: Link tasks to reflect real sequencing and impacts.
Participants / resource assignment & progress tracking: Assign work and update % complete so everyone sees status in context.
Export options: Export the Gantt chart to CSV or PDF for reporting or sharing outside Teams.
Permissions (edit control): Choose whether everyone or owners only can edit; use the tab to keep collaboration inside Teams.
Plans & limits: Free mode is great for pilots; Premium lifts core limits (e.g., from 5 tasks / 3 participants to unlimited) so you can scale.
# Commom Questions
# How to set up Gantt Chart Pro?
To make the most out of Gantt Chart Pro in effectively managing your project, follow these steps:
Install Gantt Chart Pro within your project team or channel.
ℹ️ If you want to prevent other team members from removing the Gantt Chart Pro project tab, adjust the team permissions accordingly. You can find more information here: Microsoft Teams Tabs Permissions.
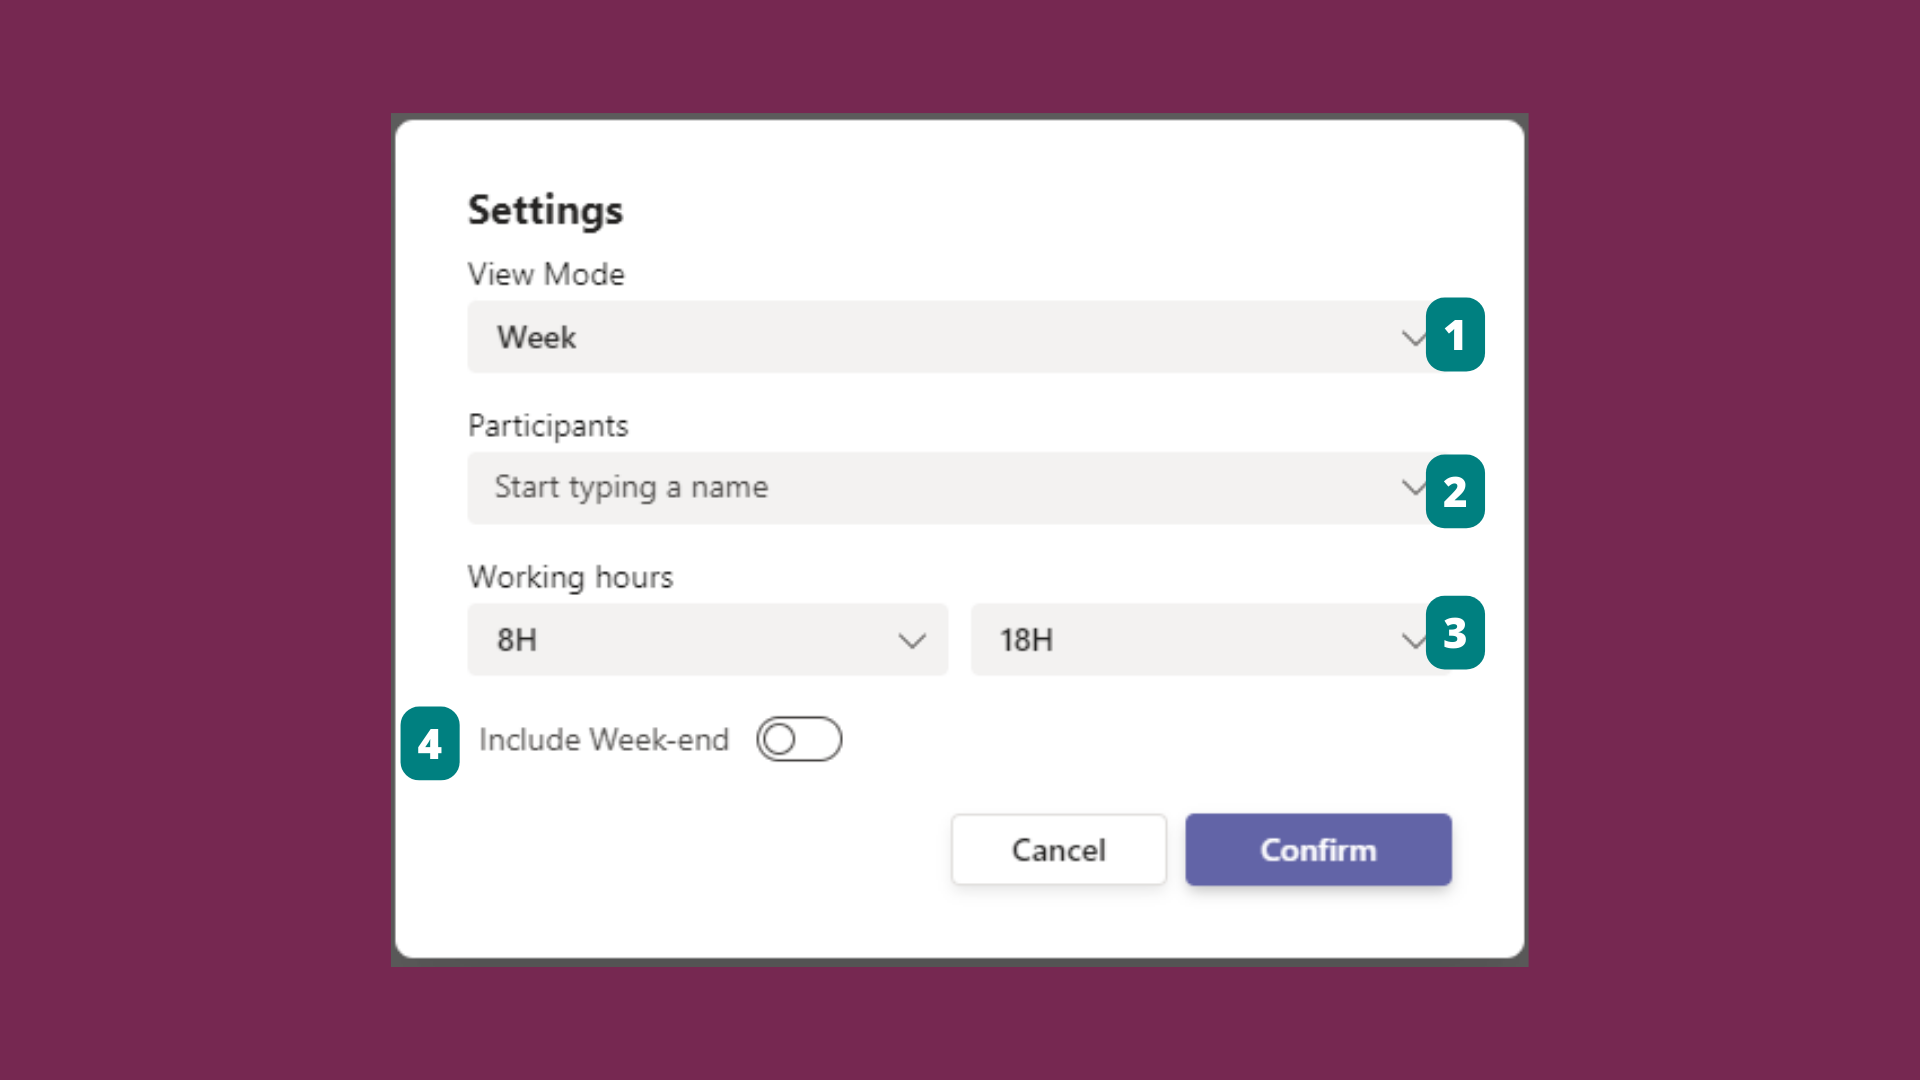
After installing Gantt Chart Pro on your channel tab, access the 'Settings' and configure the following:
Adjust the 'View' (1) based on the project's duration.
Add 'Participants' (2) which refers to the team members responsible for task assignments.
Define 'Working hours' (3) according to your schedule.
Choose whether to include weekends (4) in the planning.
Once your configuration is set, confirm the changes by clicking 'Confirm.'
# How to find the Tab ID (Unique Identifier) in Gantt Chart Pro
To locate the Tab ID (also called the unique identifier) for your Gantt Chart Pro instance:
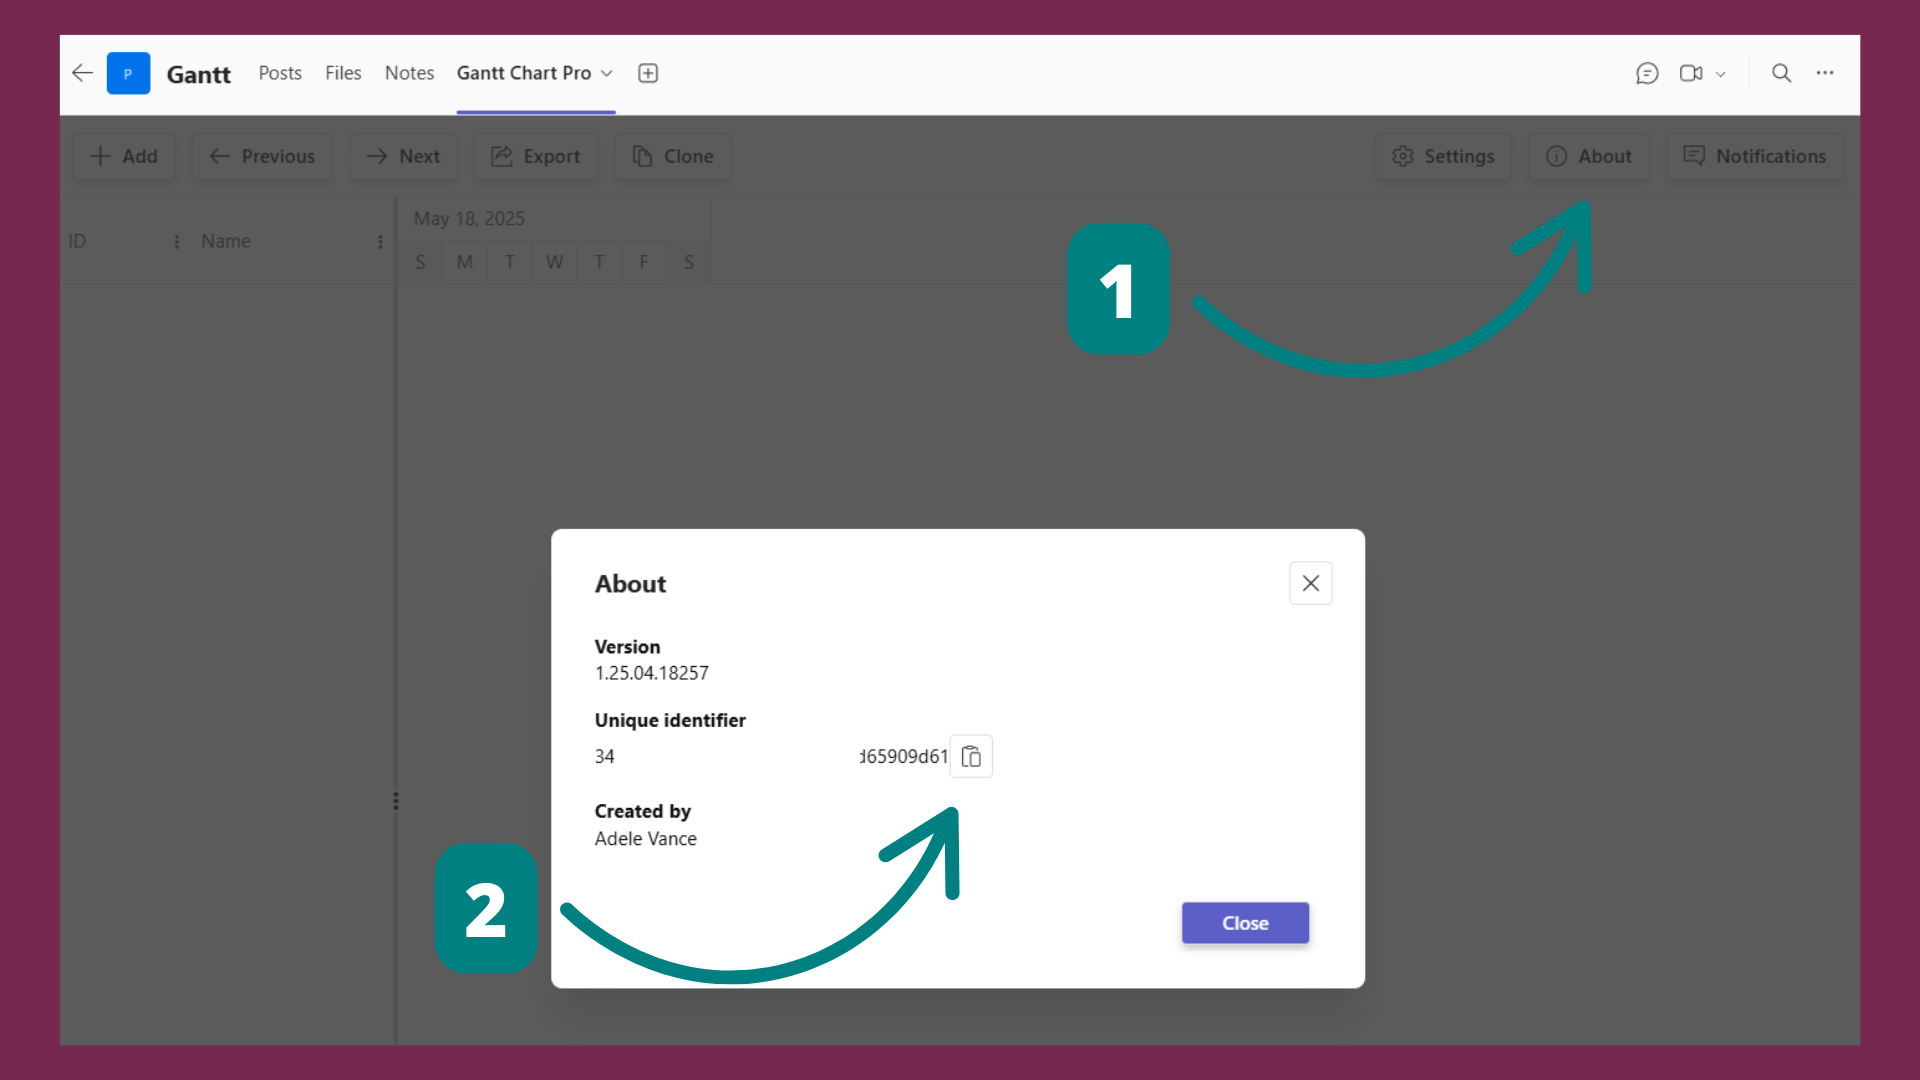
- Click the About button (ℹ️) located in the top-right corner of the Gantt Chart Pro tab.
- A pop-up window will appear showing the Version, Unique identifier, and Created by information.
- You can copy the identifier by clicking the copy icon next to it.
This identifier is useful for support or license management.
← Overview What it is →