# Create a profile api with Microsoft Flow and Sharepoint
Log in to https://flow.microsoft.com (opens new window) with your Office 365 account
Click on “Create”
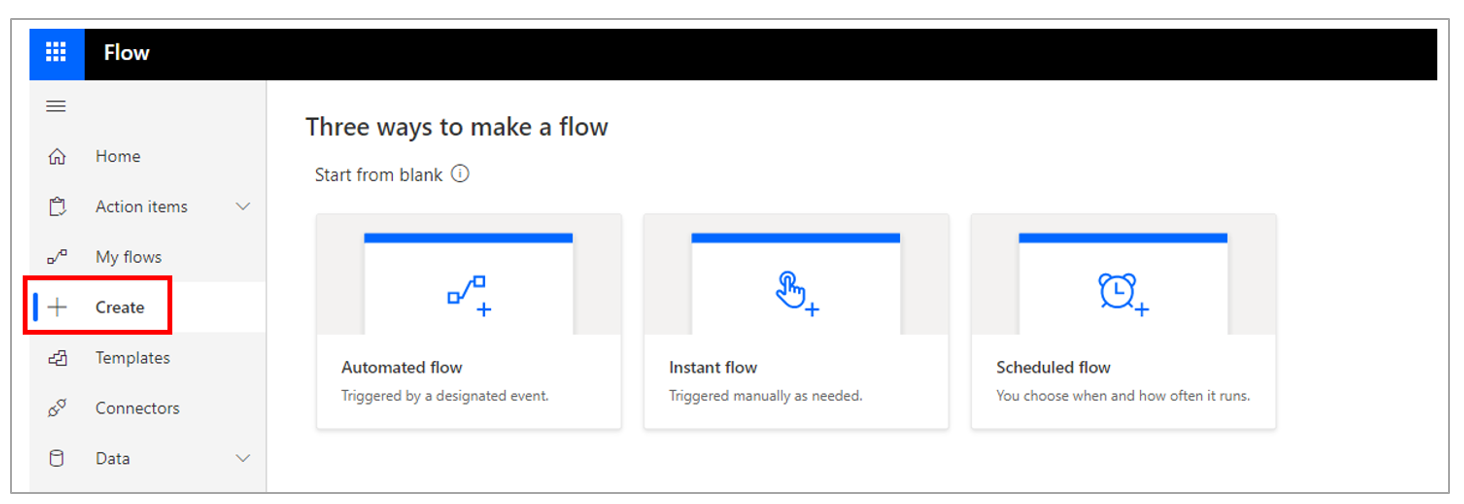
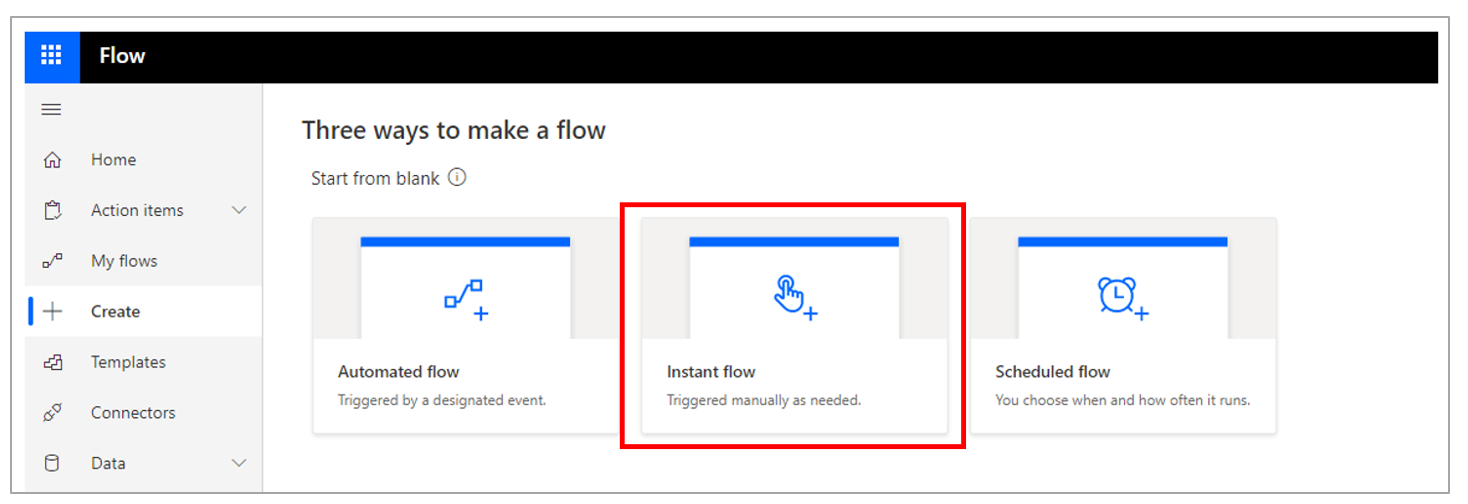
- Select then “Instant Flow”
- Select the trigger “When an HTTP request is received”
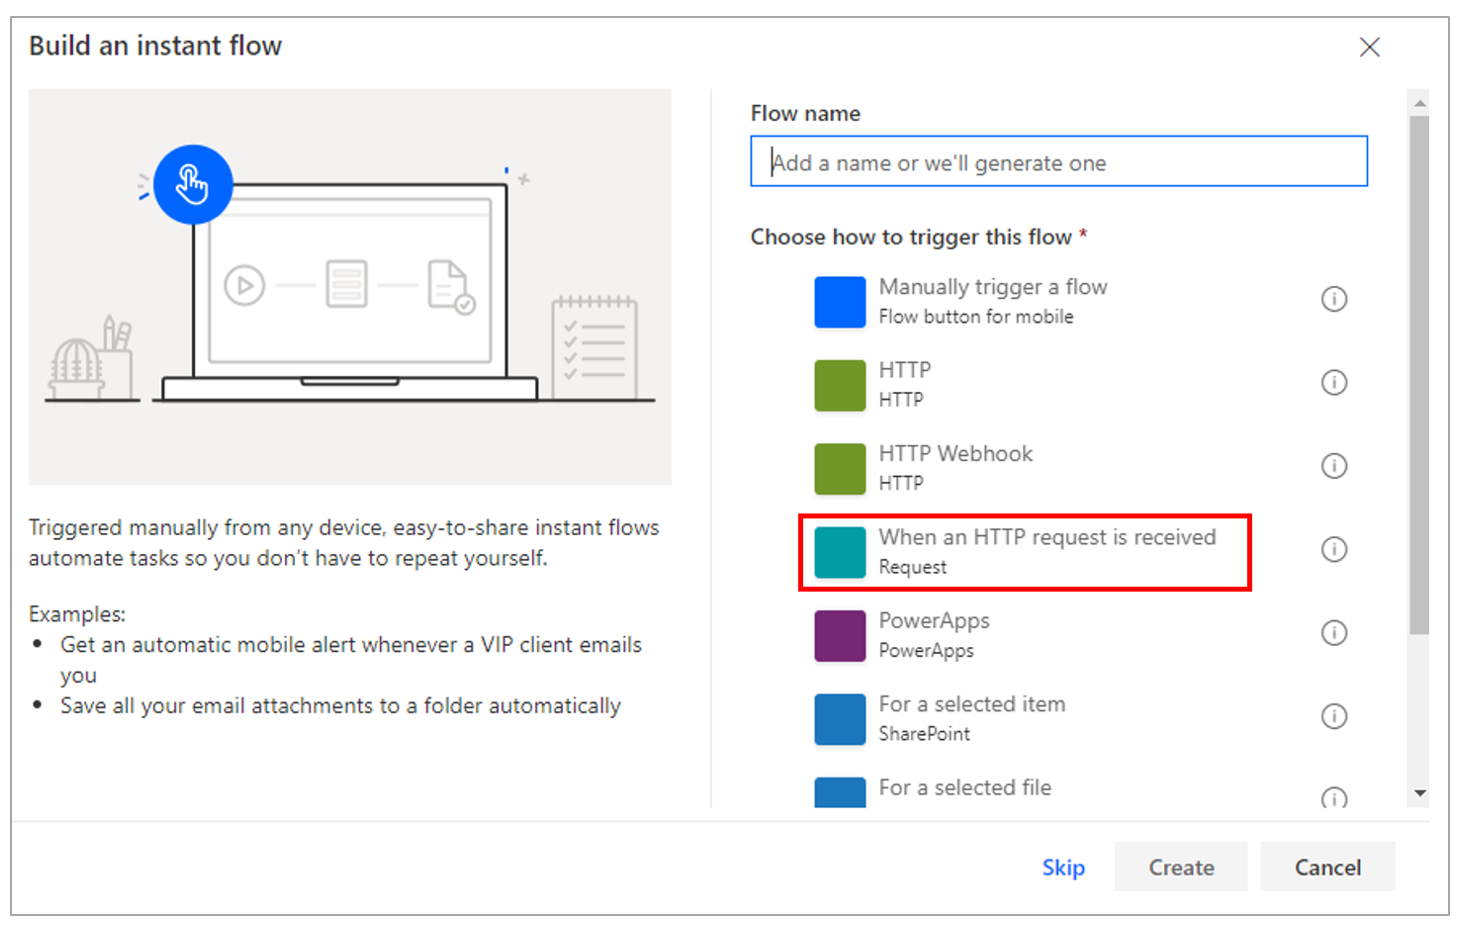
- Add the following Body JSON Schema in “Request Body JSON Schema”.
{
    "type": "object",
    "properties": {
        "userId": {
            "type": "string"
        },
        "upn": {
            "type": "string"
        },
        "aadId": {
            "type": "string"
        },
        "email": {
            "type": "string"
        },
        "channel": {
            "type": "string"
        },
        "displayName": {
            "type": "string"
        }
    }
}
This corresponds to the information of the user, sent by the chatbot when it will have to determinate the profile.
Click on “Show advanced options” and select “POST” method.
The user can talk to the chatbot
- Msteams (Teams)
- Directline (Skype for Business)
- Webchat (Webchat)
You will find this channel code in the JSON channel property above
Depending on the channel, the following information is filled in:
Skype for Business (directline)
- Email ( it also can the SIP address of the user if it differs from its email address)
- UserId: a unique Id for the user
- Display Name : The display name of the user in the AD
Teams
- Upn
- aadId: the AZURE AD Id of the user who talks to the chatbot
- UserId : a unique Id of the user teams
- Displau Name : the display name of the user in the AD
Webchat
- Email (which corresponds to the property sent in the UserId of the webchat configuration)
- UserId (which corresponds to the property sent in the UserId of the webchat configuration)
- Display Name (which corresponds to the UserName property in the webchat configuration)
⚠️
There is no need to make a distinction between channels if you only have one configured or if your email, upn and sip addresses are the same.
Here you are a sample of a SharePoint list:
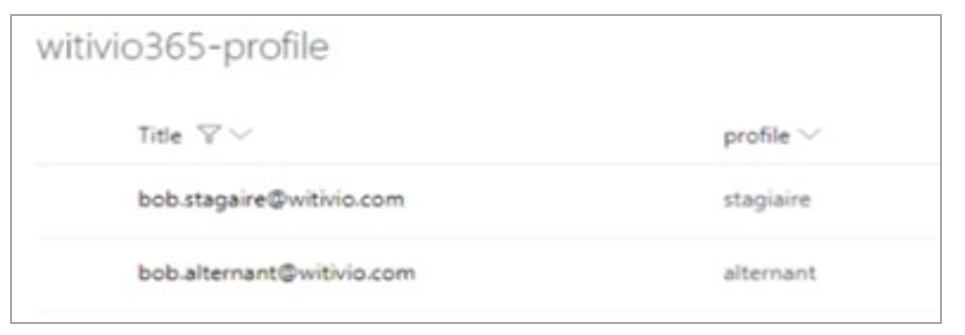
This SharePoint list is very simple. It contains the user ID in the "Title" column and the assigned profile in the "profile" column.
- Click on “New step”
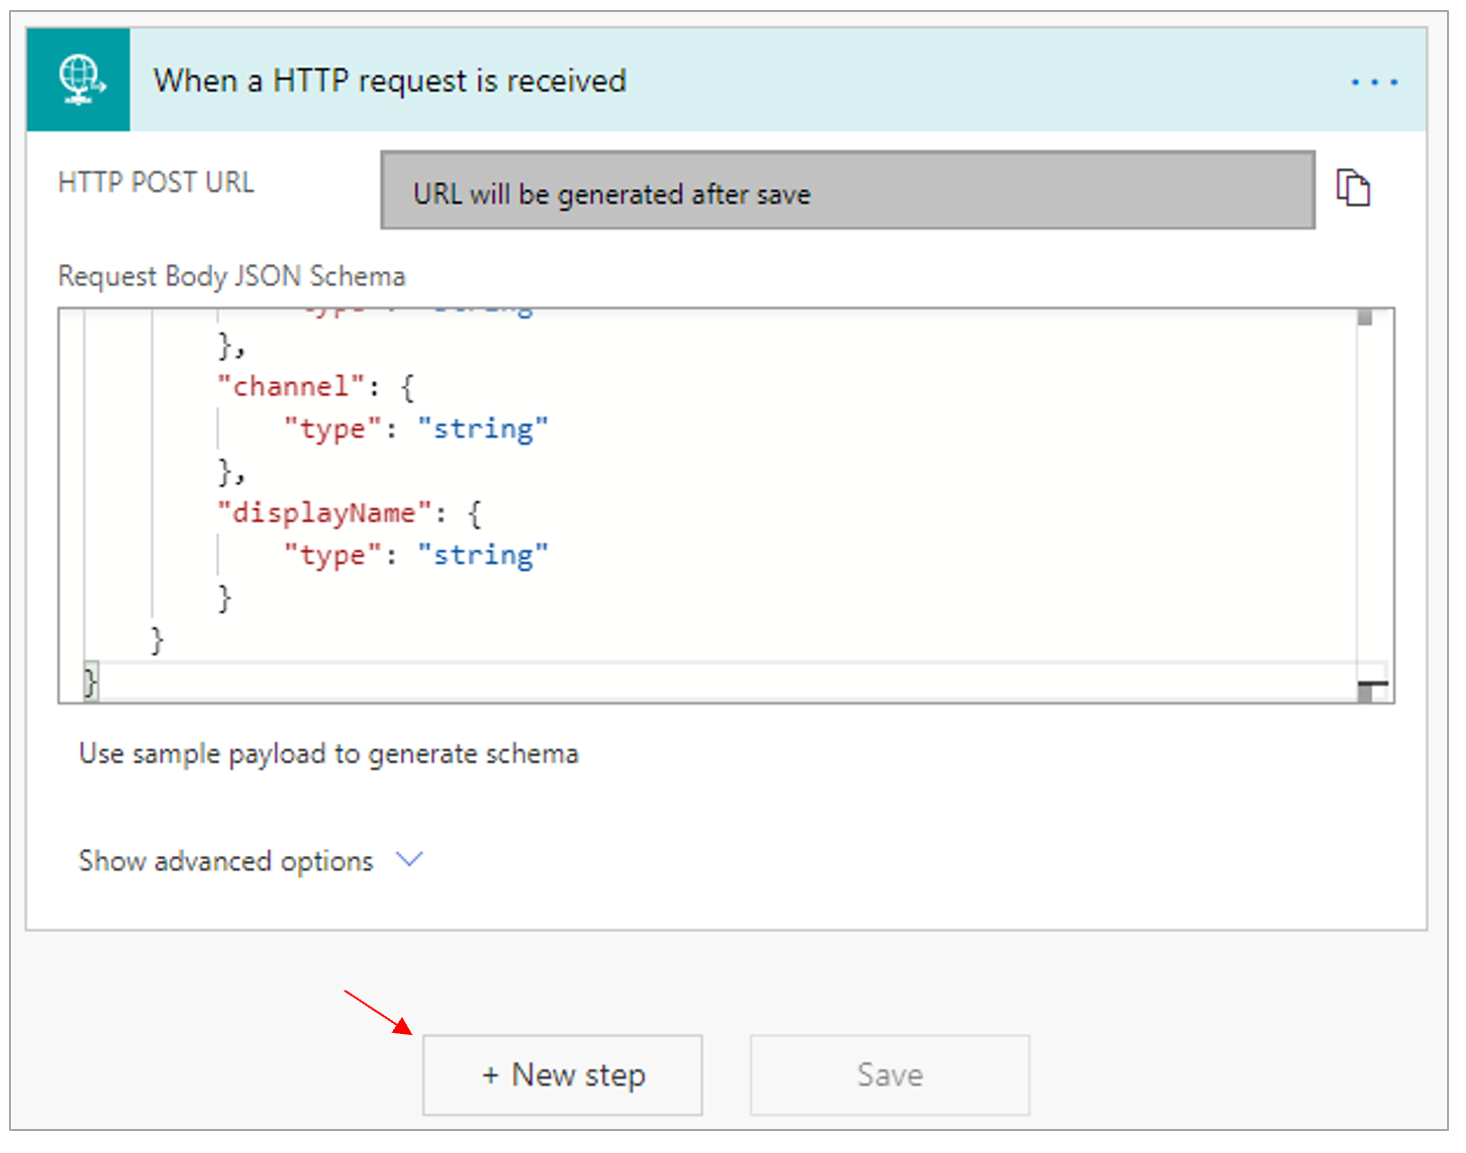
- In the section “Sharepoint” select “Get items”
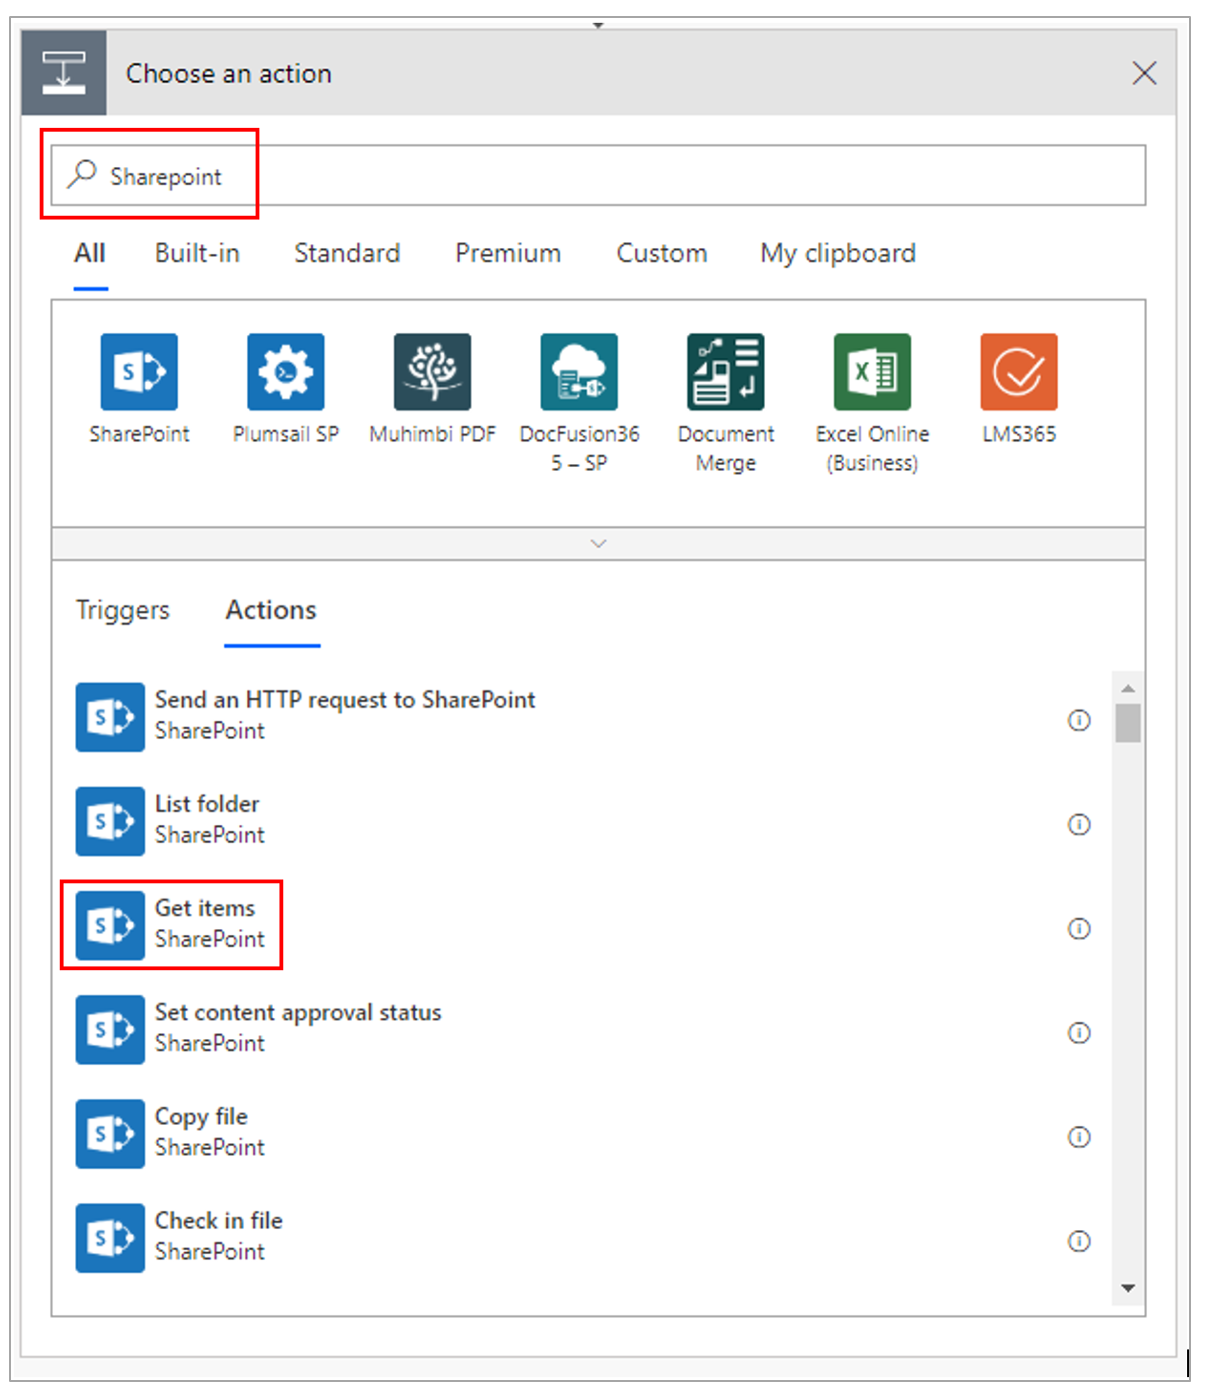
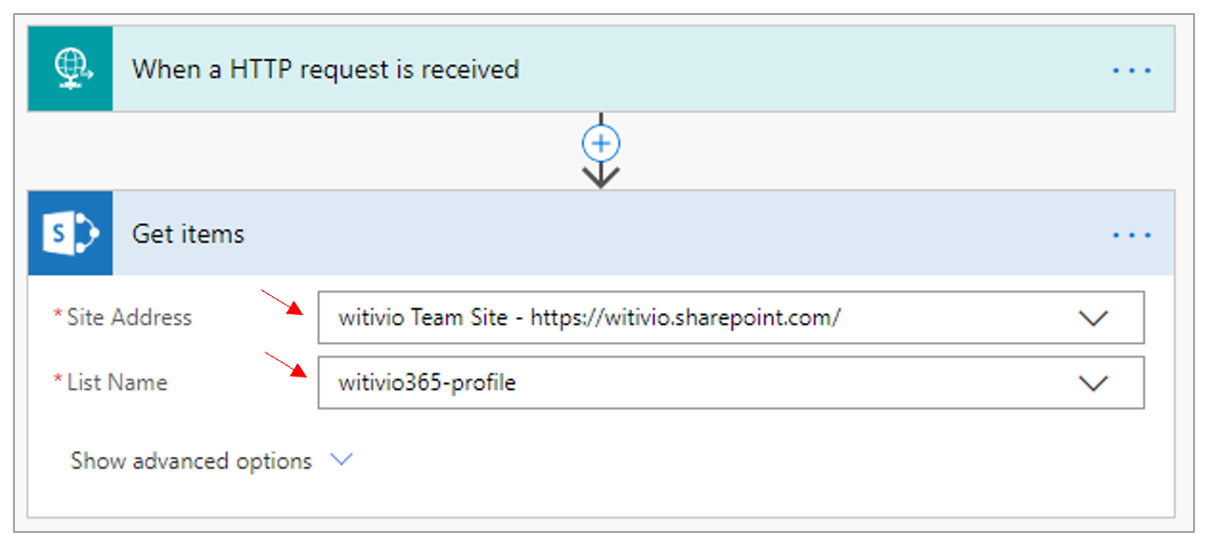
- Configure it by adding the address of the SharePoint site and the list that will be used as a basis to retrieve the profiles
- Click on “Show advanced options”
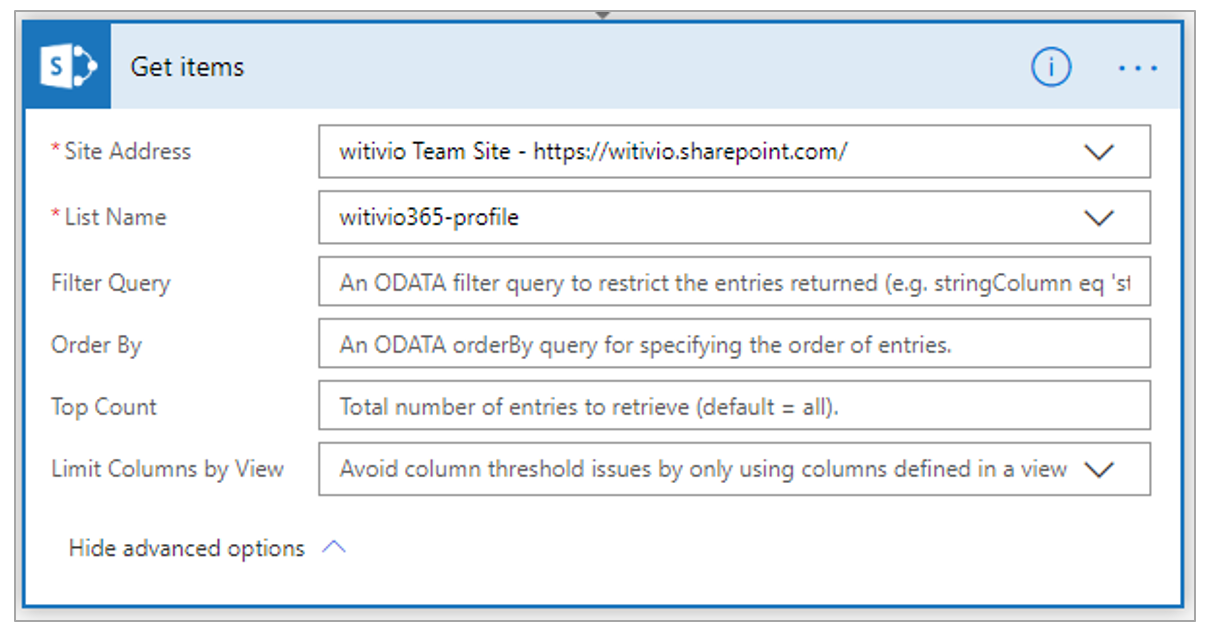
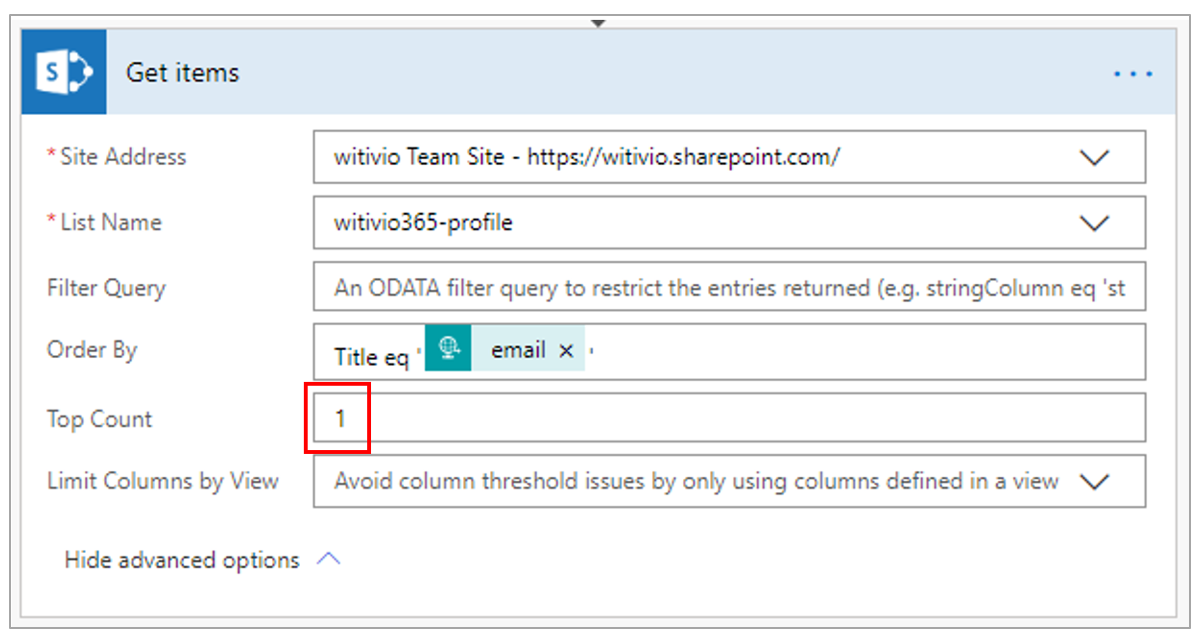
- Add the filter request Title eq ‘email’ by choosing the email property from the request pop-up
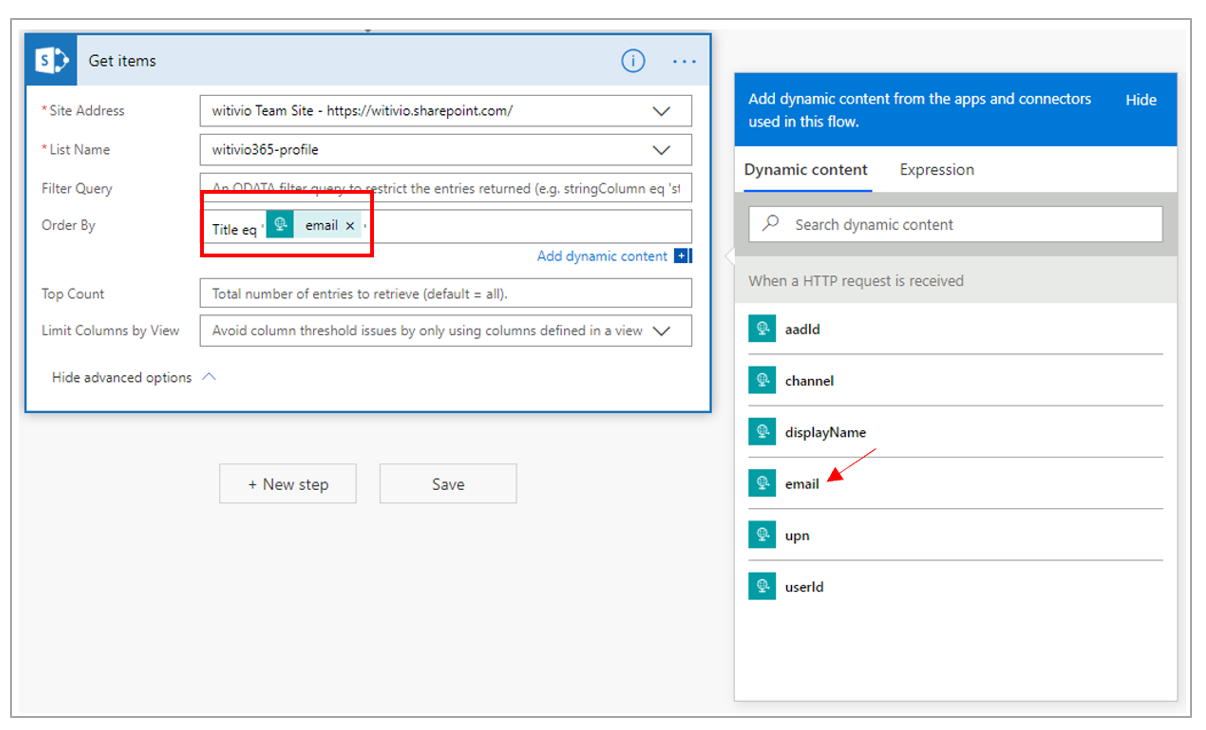
- Indicate “Top count” = 1
Add a new step
Search the “Request”
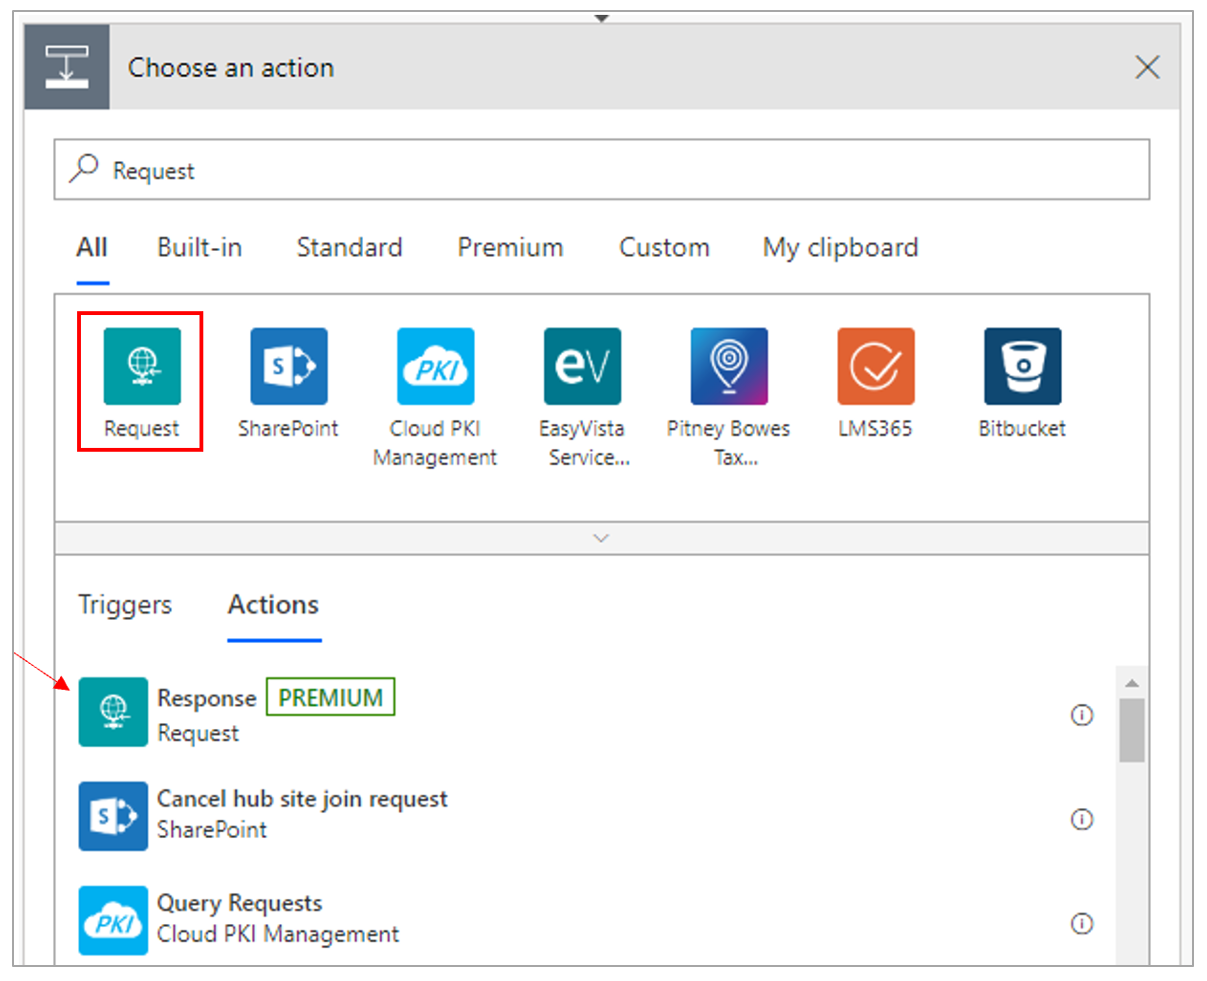
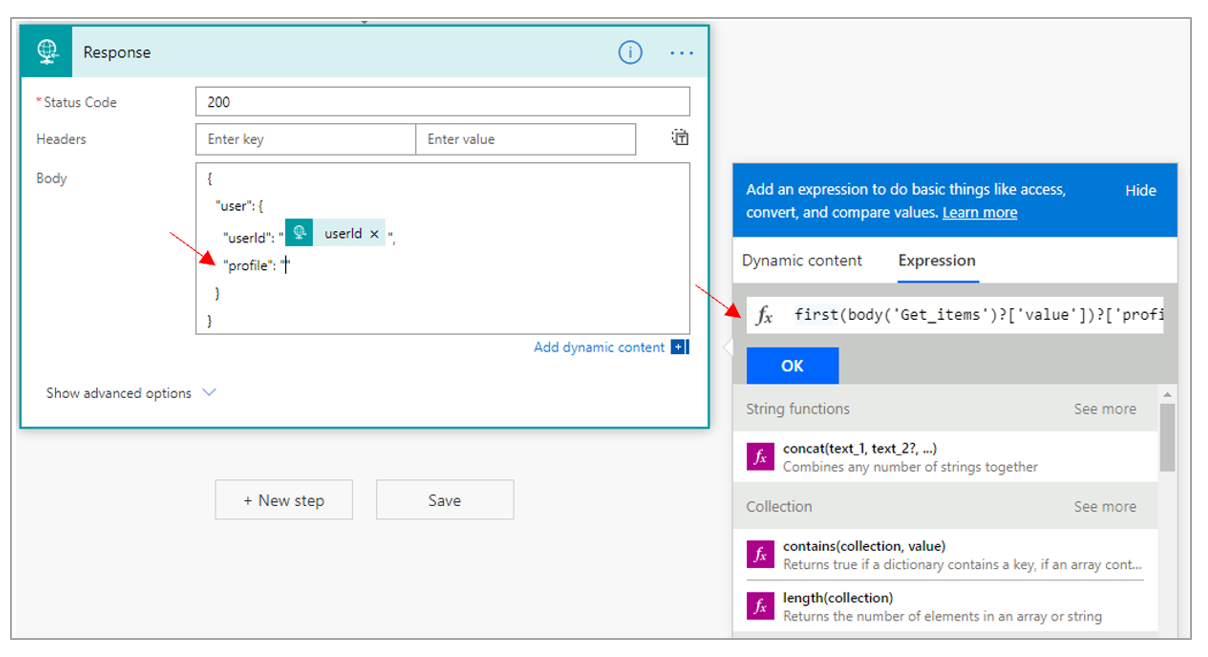
- Add the “Status Code” = 200 and in the Body add the following JSON Code:
{
  "user": {
    "userId": "",
    "profile": ""
  }
}
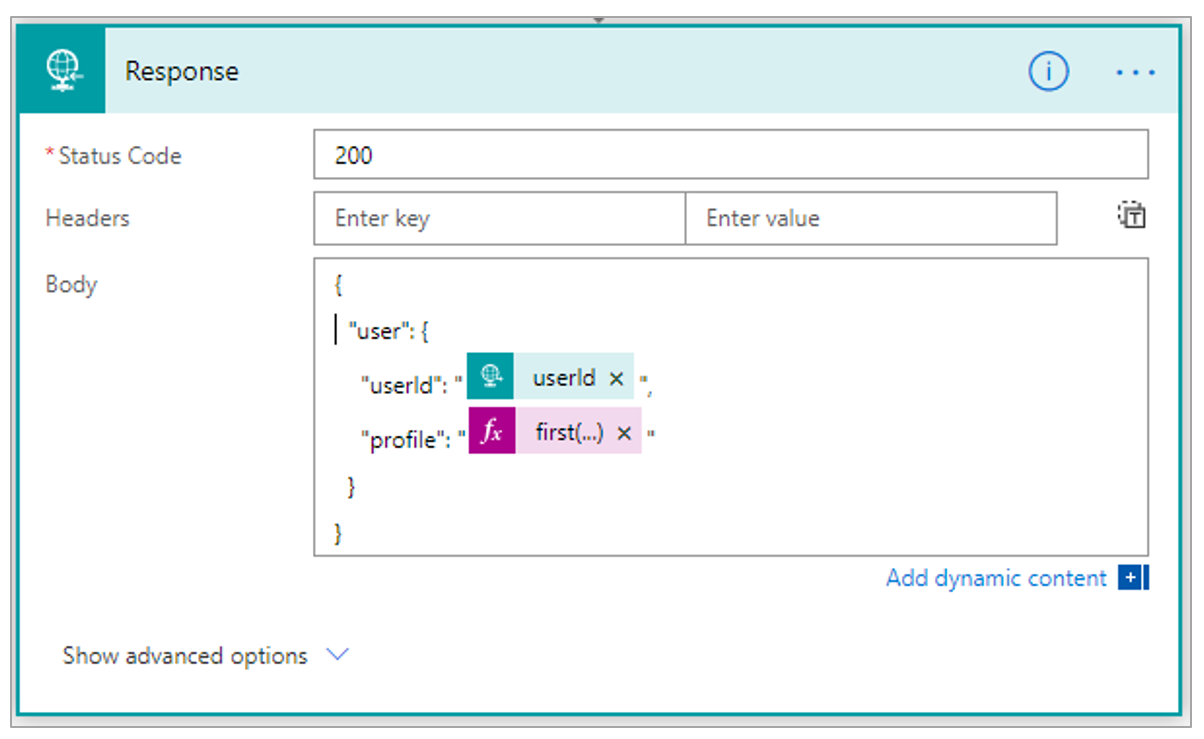
Replace the empty results with the data from the SharePoint request
- Replace UserId with the value received in input
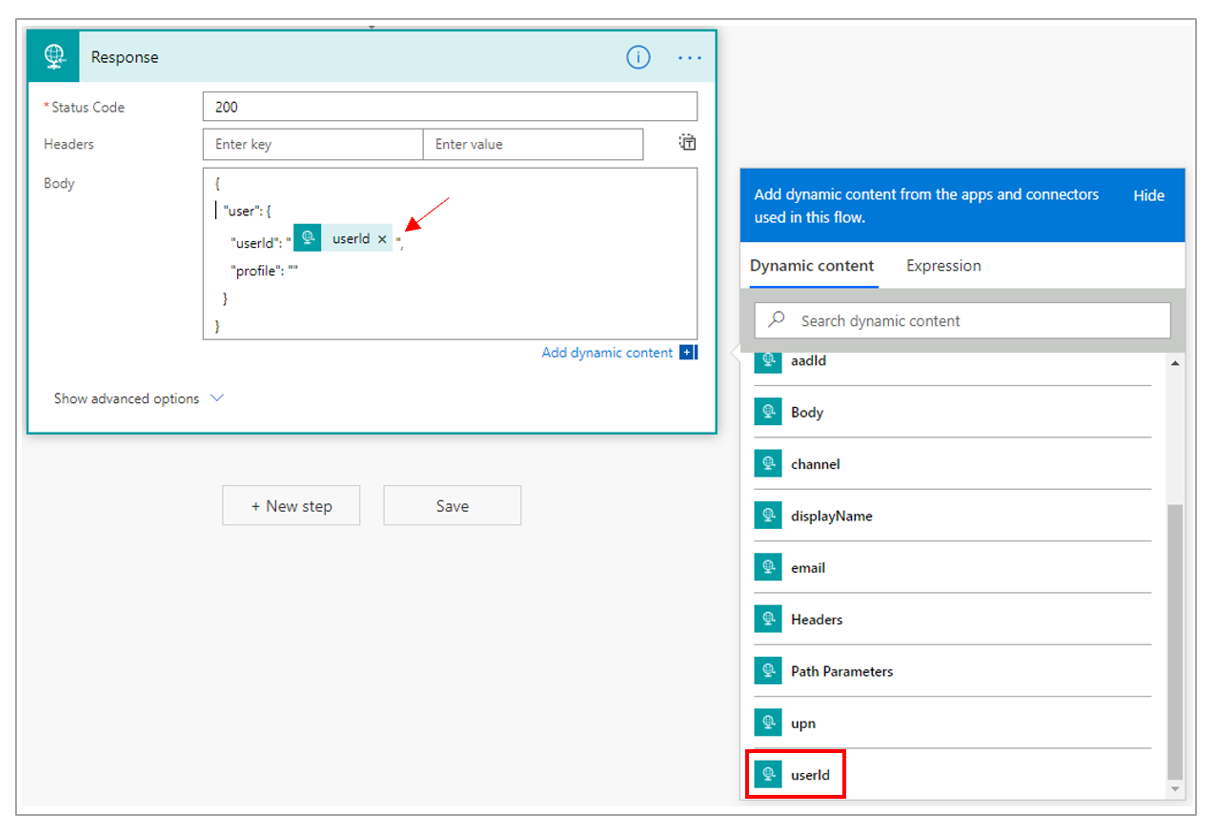
- Replace Profile with the Sharepoint value:
Expression = first(body('Get_items')?['value'])?['profile']
15- Change the name of your Flow (at the top left: for example, "Profile retrieval"). Click on save
# Use Postman to test your API
Postman is a great tool for API Testing. It is available for free download on: www.getpostman.com (opens new window)
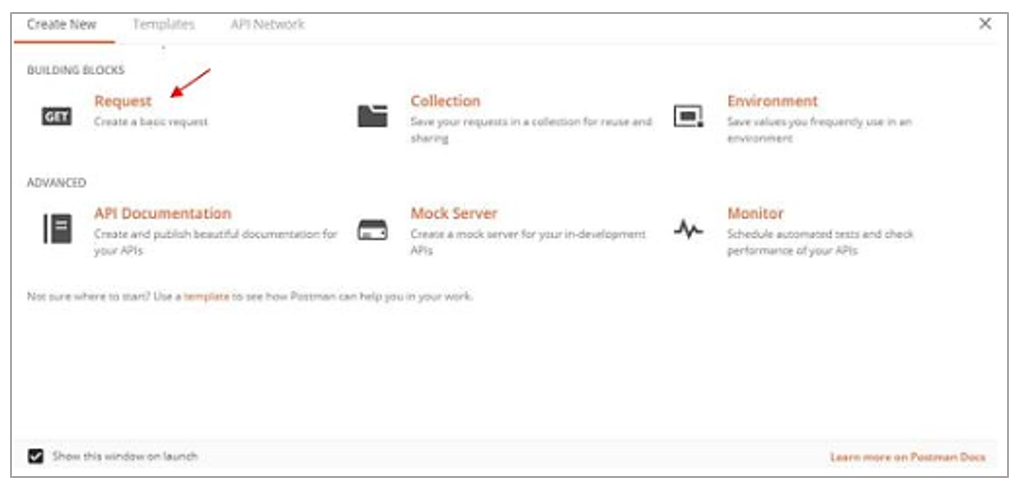
- Click on “+NEW” then on “Request” (then Cancel).
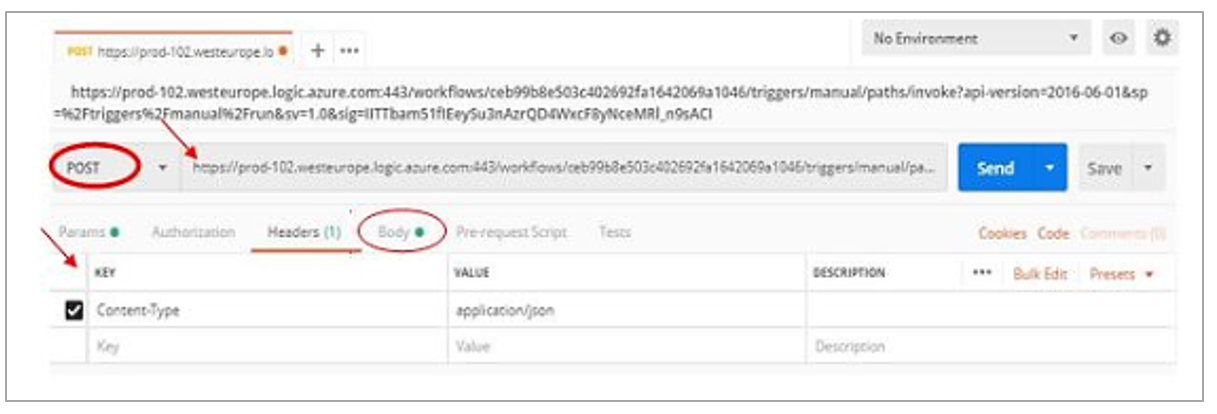
Select POST
Copy and paste the API previously created
In “Headers” select KEY: Content type and VALUE: application/json
In “Body” select “raw” and enter for example:
{
	"email": "bob.alternant@witivio.com",
	"userId": "bob.alternant@witivio.com",
	"channel": "webchat"
}
Send
Résultat : {
    "user": {
        "userId": "bob.alternant@witivio.com",
        "profile": "alternant"
    }
}
Click on “Send”
Here is an example of answer:

Once the API has been tested, you can return to the Witivio platform in the “Profile” tab and continue the configuration of the new profile. The following framework therefore allows you to configure the conditions of the profiles

- URL to query : API URL created previously
- JSON PATH : The JSON PATH query allows to verify the results sent by the API.
Equals(‘something’,’result’). Here, for example, it could be: equals(‘\$.user.profile’,’trainee’).
The $.user.profil corresponds to the JSON PATH query of the answer of the API.
See more on: https://jsonpath.com (opens new window)
If needed, it is possible to multiple the API calls to determine a profile. To this, you can add or delete a new condition. Both conditions have to be filled in to determine the profile of the user.

