# Campaign
To start a push campaign, you have to create a campaign. Click on “Communication” tab then on “Campaign”.
⚠️
This tab is available for chatbot with Skype for Business and Microsoft Teams as channel.

Click on “NEW CAMPAIGN” to create a new campaign. To configure it, name it and add the message that the chatbot will send. You can customize the message as follows:
Hello, [FIRSTNAME] +[LASTNAME].
When you add or modify a campaign, a text editor allows you to format the message.
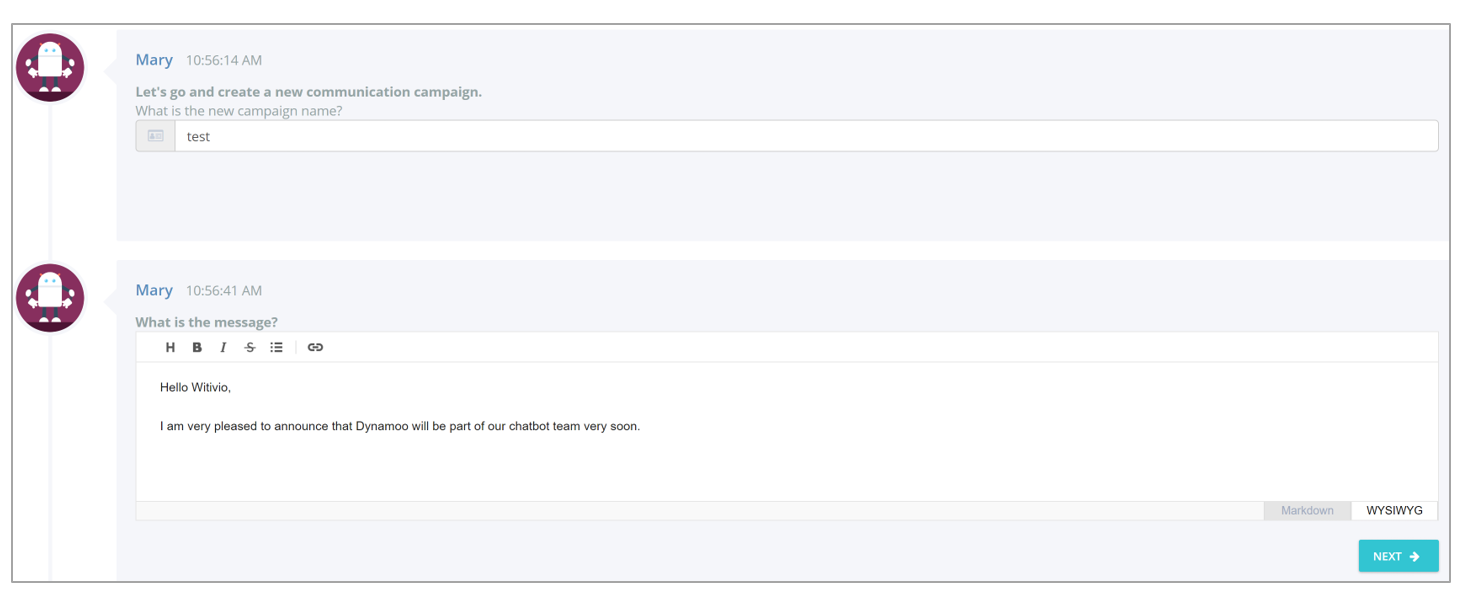
Choose the channel on which you want to boradcast your campaign: Skype or Microsoft Teams.

Recipients can be added from an existing user list but also by creating a new mailing list.

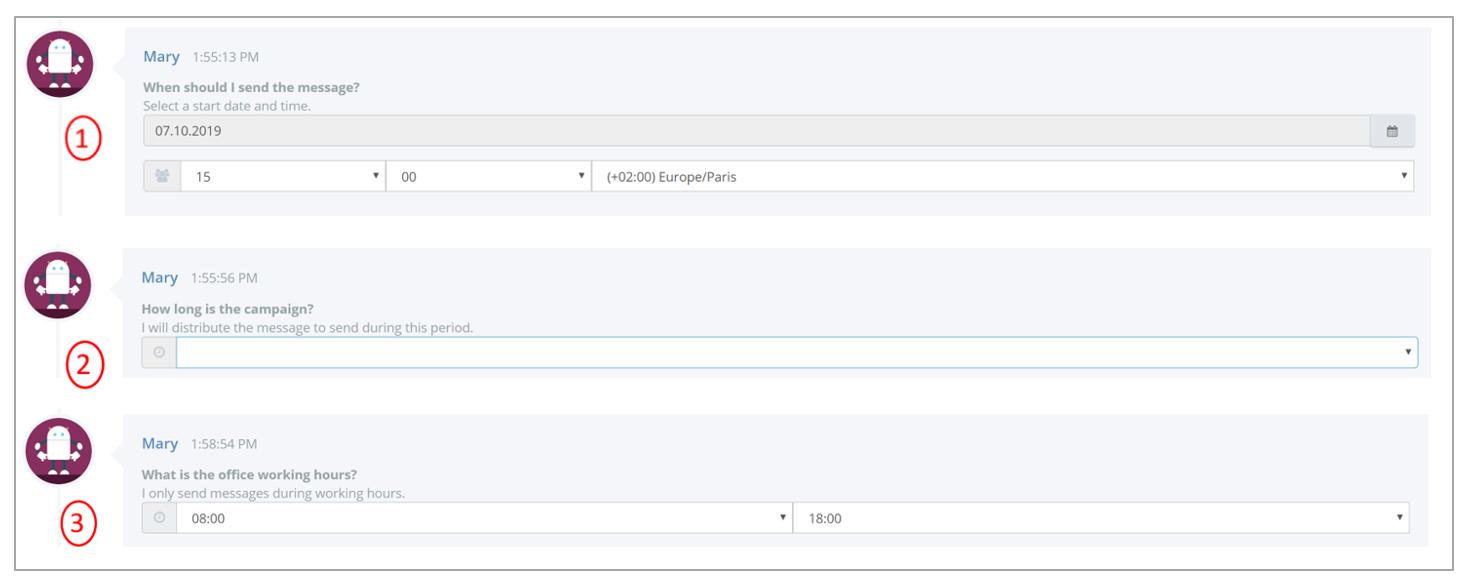
Select the day from which the message will be sent (1), the duration of the campaign (2) and then indicate the working hours of your companies (3).
# Only for the channel Skype
You can schedule the sending of the message when the recipients are "available" on Skype, or push the message when the status of the recipients is "available", "absent" or "busy" in Skype.

The programmed message is sent randomly and not at the same time to all recipients. When a campaign lasts several days, here is the sending process in case of absence of the recipient:
- At a pre-calculated time
- 10 minutes later
- At the exact time after the time of the first message (for example at 2:27 p.m. then at 3:00 p.m.)
- The next day during opening hours
This process is repeated 3 times, after this, the message will then be unprogrammed.
Once the campaign is over, you will find in the "Campaigns" tab a report to evaluate the success of your communication. For example, the click engagement measures the number of people who clicked on a link included in the sent message.

A campaign can be modified only when it has not yet been broadcast. Once it has been released, you will be able to get information about it or delete it.
Click on « iNFORMATION » to know:
- The channel
- The message of the campaign
- The name of the list
- The starting date and hour
- The duration of the campaign
You can also delete the campaign (DELETE button) or test it (TRY button).
⚠️
Once a campaign has started, it cannot be modified or cancelled.

The “TRY” button allows you to test if the campaign works well.
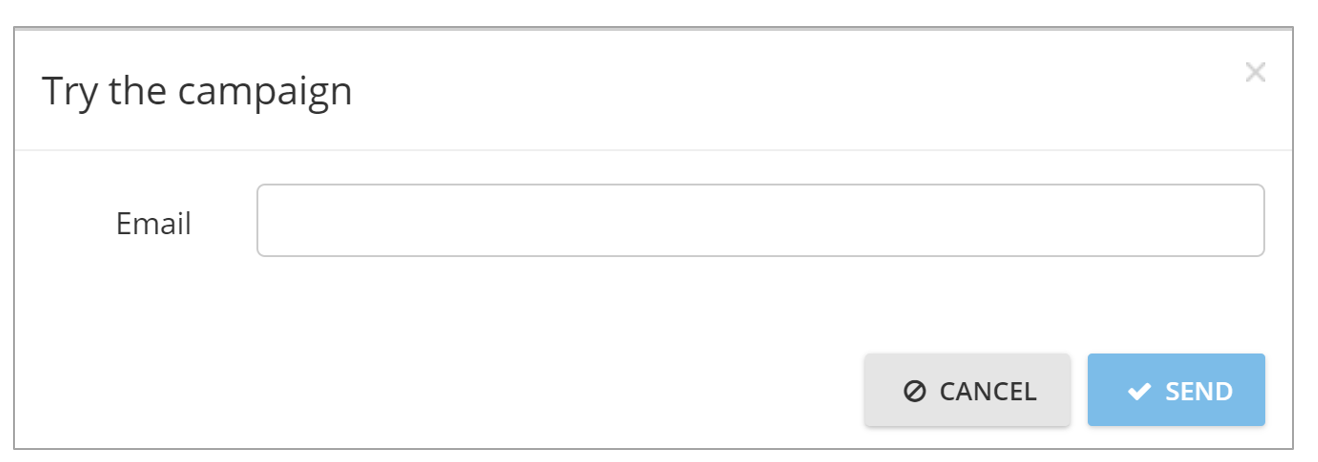
Enter your e-mail address to check the efficiency of your campaign. If the campaign is configured well, you will get the message of the chatbot.
💾
Do not forget to save changes.
How to create a push campaign
# Teams campaigns
Click on Communication tab and then on Teams Campaigns.

Give your campaign a name and choose the type of message you want to program among the following formats:
- Idea
- Success
- Important
- Adaptive card
- Message
# Idea
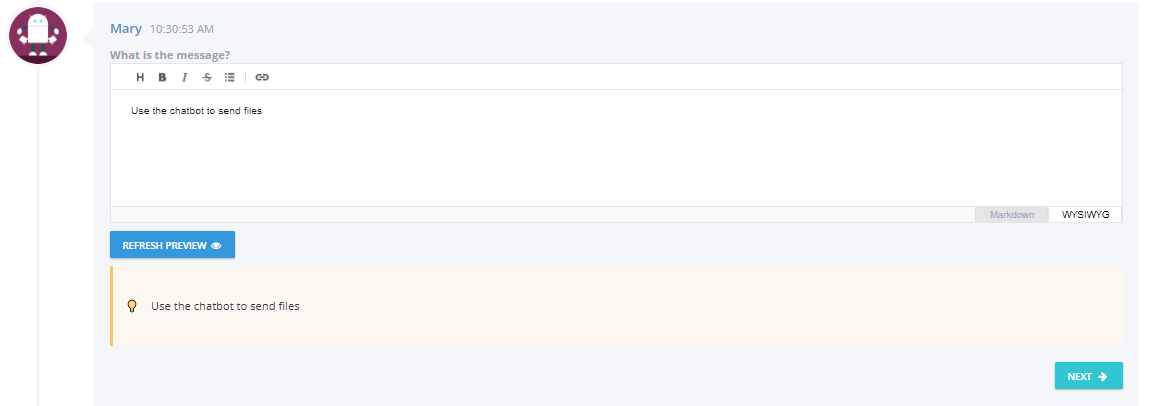
Set up the idea message you want to send using the text editor. Once you have added your message, click Next and then refresh Preview before going on to set up your push message.
# Success
Using the text editor, configure the success message, for example to make an announcement. Once you have added your message, click Next and then refresh Preview before going on to configure your push message.
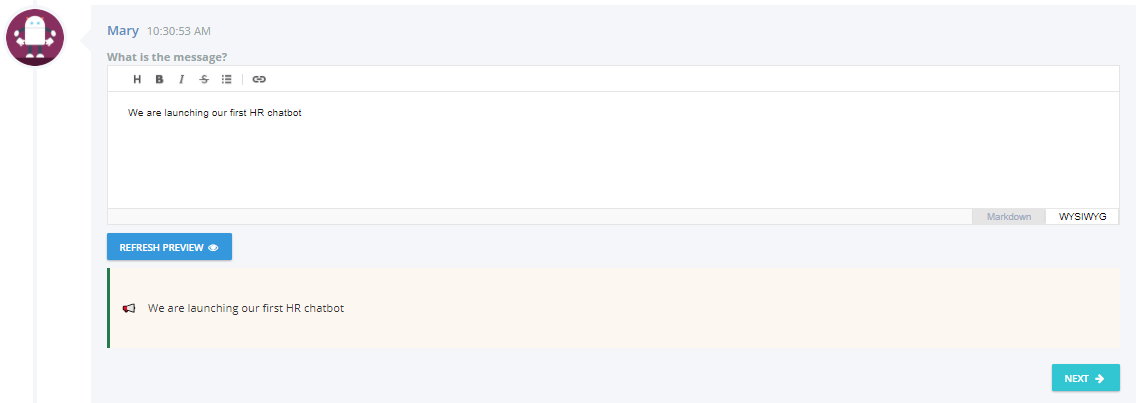
# Important
Using the text editor, set up an important message, for example to communicate a deadline. Once you have added your message, click Next and then refresh Preview before going on to configure your push message.

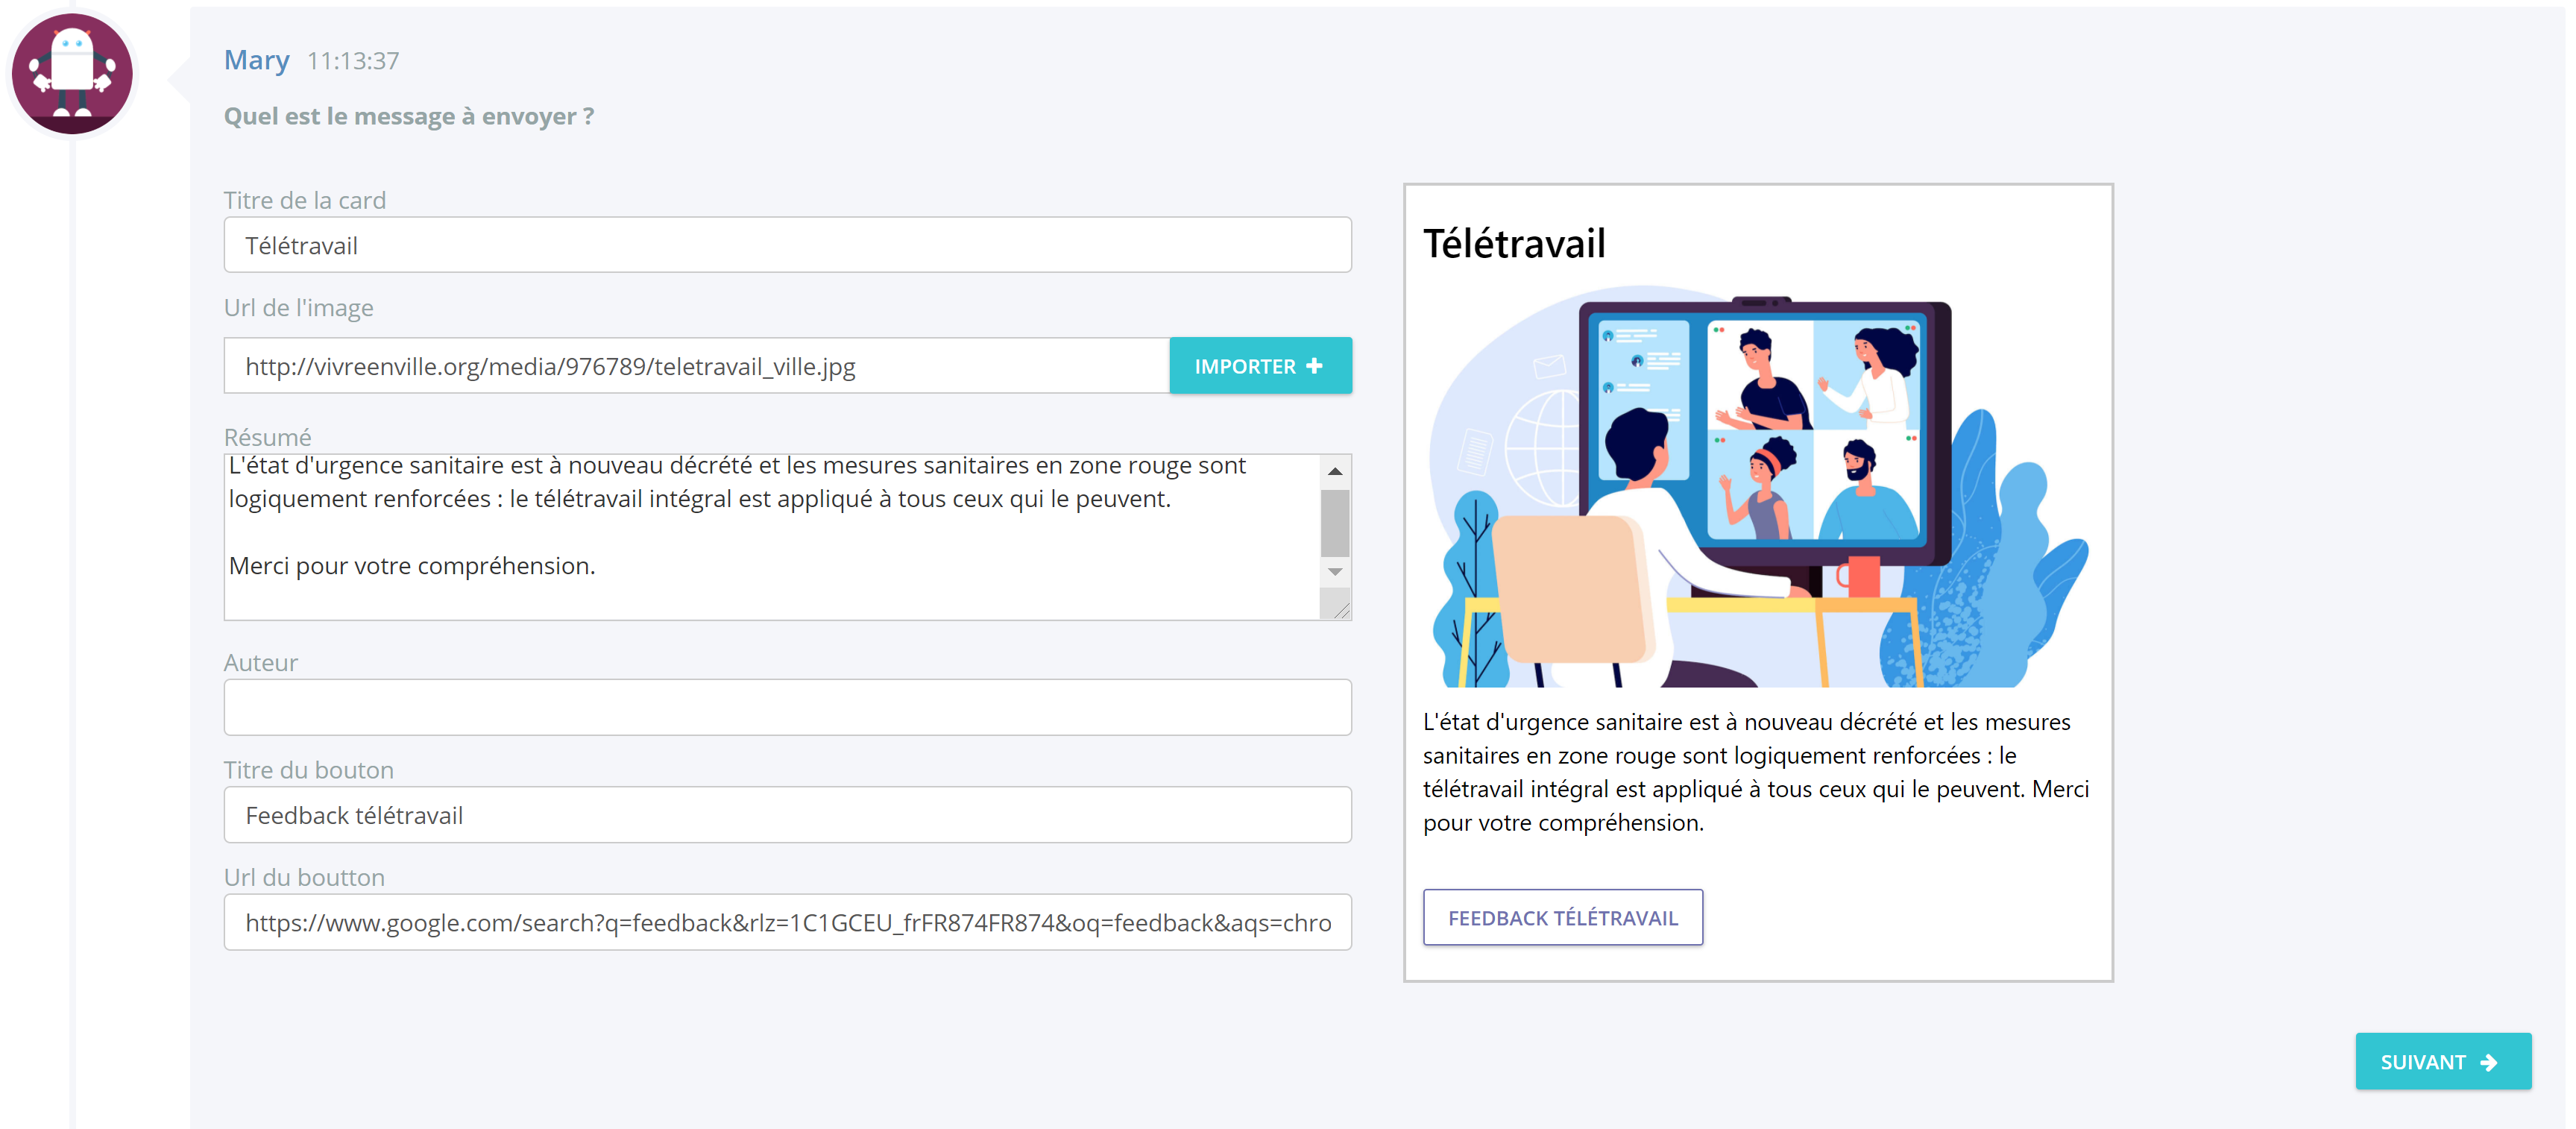
# Adaptive card
Create your push message in Adaptive Card format. Add a title, an image, text or a button. Once you have added your message, click Next to continue configuring your push message.
# Message
Use this format to create a simple message. Once you have added your message, click Next and then refresh Preview before going on to configure your push message.

Once the message is created, you can distribute the message :
- to a new distribution list
- an existing distribution list
- to all users: this means users who have the chatbot application on their Teams.
⚠️
In order to get the scheduled push message, a user must have the chatbot installed on Microsoft Teams.
Save your draft. Click on EDIT your campaign if you want to :
- Modify your message
- Delete the campaign
- Try the campaign
- Send the campaign
- TRY
Before sending the campaign, you have the possibility to try it. Add an email address and click on verify. This will allow you to check if the user has the chatbot application installed in Microsoft Teams. The sending will not be available until the email address corresponds to a valid user.
- SEND
When editing your message, you can decide to send it now or schedule it to be sent later.
Click on the arrow to the right of the SEND NOW button, then select Send Later: the campaign can be scheduled to be sent with a delay of up to 6 days.
The campaign is then saved and sent at the time decided.
Once the campaign is finished, find a report in the Teams Campaign tab > Completed.
Click on REPORT to have a summary of the campaign:
- Campaign name
- Date and time sent
- Result: error, success, rescheduled or ongoing.
- Recipients

# Survey campaigns
# Create a new campaign
To create a new campaign please use the button new campagaign.
- Fill the name of your campaign
- Choose the type of campaign message format survey.
- Select the survey you've created earlier.
- Select the distribution list
- Save as draft.

⚠️
In order to get the scheduled push message, your users must have the chatbot installed on Microsoft Teams.

Once you have created your campaign you can now click on edit and use different fonctionnalities.
- Clone
If you want to create a new campaign same as this one. You can use this button to create a copy. Click on the button, add the new title and validate your action. A new copy is created on your campaign dashboard.
- TRY
Before sending the campaign, you have the possibility to try it. Add an email address and click on verify. This will allow you to check if the user has the chatbot application installed in Microsoft Teams. The sending will not be available until the email address corresponds to a valid user.
- SEND
When editing your message, you can decide to send it now or schedule to send it later.
Click on the arrow to the right of the SEND NOW button, then select Send Later: the campaign can be scheduled to be sent with a delay of up to 6 days.
The campaign is then saved and sent when it's time.
Once the campaign is finished, find a report in the Teams Campaign tab.
When you choose send now you might need to wait a few minutes to receive it into your application.
